How to Get Oil Out of Concrete
Oil does not sit on concrete — it soaks into it. That is why scrubbing fails. Here is what actually pulls oil back out, matched to how old the stain is.
Alex Rivers
Home Improvement Editor
Last Updated
October 17, 2026
In This Guide
Concrete is a sponge with a hard surface. An oil spill that looks like a puddle for the first ten minutes is actually migrating downward into a network of capillary pores, and within a day most of it is below the surface where no amount of scrubbing reaches. That single fact explains why degreaser and a stiff brush disappoint so often, and it points to the methods that do work: absorption while the oil is fresh, and poultice extraction once it is not.
Our Picks at a Glance
The Short Answer
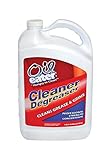
Oil Eater Original Cleaner Degreaser (Best All-Purpose Degreaser). The degreaser to keep on the shelf. It handles fresh spills completely and prepares old stains for poultice treatment.
- Check Price
- Check Price
- Check Price
- Check Price
- Best for Prepping Before Coating Krud Kutter Concrete Cleaner & Degreaser — Water-Based Concrete DegreaserCheck Price
We may earn a commission when you buy through these links, at no extra cost to you. How we test
Best All-Purpose Degreaser
Oil Eater Original Cleaner Degreaser
1. Why Oil Stains Are So Hard to Remove
Even a well-finished slab is roughly 10-15% air by volume, laced with capillary pores far too small to see. Oil, being low-viscosity and non-polar, wicks into that network readily — and the warmer the slab, the faster it travels. A summer spill on a hot driveway penetrates deeper in an hour than the same spill on a cold slab does in a day.
That geometry defines the whole problem. Surface cleaning removes the oil you can see and leaves the oil that actually causes the stain. Within a few days the remaining subsurface oil wicks back up and the stain reappears, which is the frustrating cycle most homeowners recognize. Any method that genuinely works has to either get the oil before it penetrates, or reverse the direction of travel and pull it back out.
The Numbers
15%
Typical air void content of concrete
30 min
Window where absorbent powder works best
24-48 hr
Poultice dwell time for old stains
2-4x
Repeat cycles a deep stain usually needs
The Three Mechanisms That Actually Work
Absorption uses a dry powder to soak up liquid oil before it penetrates. Only useful while the spill is still wet, but hugely effective in that window.
Poultice extraction applies a wet absorbent paste that soaks into the concrete, dissolves the oil, and then — as it dries — pulls the dissolved oil back up into itself by capillary action. This is the only method that removes oil from below the surface, and it is why poultices outperform everything else on old stains.
Biological digestion uses enzyme or microbial cleaners whose organisms consume hydrocarbons over days or weeks. Slow, but it reaches oil at depths a poultice cannot and leaves nothing behind to rinse.
2. Fresh Spills: The First 30 Minutes
If the oil is still wet, you have the easiest job you will ever have with it, and speed matters more than product choice.
Step 1: Blot, Never Wipe
Lay paper towels or rags on the spill and press. Wiping spreads the spill across more surface area and drives oil into the pores under pressure — you turn a small deep stain into a large one. Lift and replace towels until they stop coming up saturated.
Step 2: Cover With a Dry Absorbent
Pour a generous layer of dry absorbent over the whole spill — enough to fully cover, not a dusting. Options in rough order of effectiveness: clay-based oil absorbent (the granular product sold at auto parts stores), unscented clumping cat litter crushed fine, cornstarch, baking soda, or sawdust. Grind granular products underfoot or with a brick to break them down; finer particles have far more surface area and absorb much faster.
Step 3: Let It Sit
Give it a minimum of 30 minutes, and overnight is better for anything more than a few tablespoons. There is no downside to leaving it longer. Sweep up and dispose of the used absorbent in the trash — never rinse it into a storm drain, which is both illegal in most jurisdictions and genuinely harmful.
Step 4: Degrease the Remaining Shadow
Whatever gray shadow remains is oil that already entered the surface layer. Apply a concrete degreaser or a strong dish soap solution, scrub with a stiff nylon brush, let it dwell 10-15 minutes without drying out, and rinse with hot water. On a fresh spill handled this way, this usually finishes the job.
Do Not Reach for the Pressure Washer First
Pressure washing a fresh oil spill drives oil deeper into the concrete and sprays it across a much wider area — turning one small stain into a large faint one that is harder to treat. Absorb first, degrease second, and only pressure wash at the end to remove loosened residue.
3. Old, Set-In Stains: The Poultice Method
For a stain that is weeks, months, or years old, absorption is useless — the oil is already deep in the slab. The poultice is the method that works, and it is the single most effective technique in this entire guide.
How a Poultice Works
You mix an absorbent powder with a solvent into a paste roughly the consistency of peanut butter, spread it thickly over the stain, and seal it under plastic so it stays wet. The solvent soaks into the concrete and dissolves the trapped oil. Then you remove the plastic and let the poultice dry — and as it dries, capillary action pulls the dissolved oil up out of the concrete and into the drying paste. When you sweep it away, the oil goes with it.
Step-by-Step Poultice
1. Choose your absorbent. Diatomaceous earth is the best performer. Fine clay absorbent, talc, or hydrated lime also work. Flour and cornstarch work in a pinch but are messier.
2. Choose your solvent. Acetone or lacquer thinner for petroleum oils; mineral spirits for a gentler option; xylene for heavy grease. Work outdoors, wear nitrile gloves and eye protection, and keep all sources of ignition well away.
3. Mix to a thick paste — it should hold its shape on a putty knife without running.
4. Apply half an inch thick, extending an inch or two past the visible stain edge, since the oil below is always wider than what you can see.
5. Cover with plastic sheeting taped at the edges and leave for 24 hours. This keeps the solvent working rather than evaporating.
6. Remove the plastic and let it dry completely, usually another 24 hours. This drying phase is where extraction actually happens — do not rush it.
7. Scrape and sweep up the dried poultice, then rinse the area.
8. Repeat. Deep stains typically need two to four cycles. Each pass visibly lightens the stain; when a cycle produces no further improvement, you have reached what is recoverable.
Commercial Poultice Products
Pre-mixed oil stain removers using the same principle are widely available and remove the solvent-handling risk. They are more expensive per application than mixing your own but genuinely easier and safer, and the good ones perform comparably. If you are not comfortable handling acetone or xylene, this is the right route.
4. Other Methods, Ranked by What Actually Works
The internet is full of oil removal advice, and the quality varies enormously. Here is an honest ranking.
| Method | Best For | Verdict |
|---|---|---|
| Solvent poultice | Old, deep stains | Best method there is |
| Dry absorbent | Wet spills | Excellent, but only while wet |
| Enzyme/microbial cleaner | Deep or repeated stains | Slow but reaches deepest |
| Alkaline degreaser | Surface film, recent stains | Good for what it reaches |
| Dish soap and hot water | Very fresh, light spills | Works better than expected |
| Pressure washing alone | Rinsing after treatment | Does not remove absorbed oil |
| Coca-Cola | Nothing | Myth — mild acid, no oil affinity |
| Muriatic acid | Nothing, for oil | Etches concrete, leaves stain |
Why Enzyme Cleaners Deserve More Attention
Microbial cleaners contain bacteria cultures that metabolize hydrocarbons, converting oil into carbon dioxide and water. They work slowly — days to weeks, kept damp — but they reach oil at depths that no poultice can pull from, and they leave nothing behind. For a driveway with years of accumulated drips, applying a microbial cleaner and keeping it damp for a couple of weeks often produces better results than any single aggressive treatment.
Why Acid Is the Wrong Tool
Muriatic acid dissolves cement paste. It does not dissolve oil. What it actually does is etch away the top layer of concrete, which can make a stain look lighter by removing the surface, while permanently roughening the slab, exposing aggregate, and leaving it more absorbent and more prone to staining next time. Skip it.
5. The Best Products for Getting Oil Out of Concrete
We tested these on a garage floor with stains ranging from a fresh spill to a five-year-old drip patch under a parked truck, following each product's own instructions.
Oil Eater Original Cleaner Degreaser
Water-Based Alkaline Degreaser
Oil Eater is the product we reach for first on anything that has not been sitting for years, and the one we would tell someone to buy if they were only buying one thing. It is a concentrated water-based alkaline degreaser that emulsifies oil so it can be rinsed away, and in our testing it removed the entire surface film from a fresh spill and from a stain a few weeks old, leaving concrete that looked untreated. On a two-year-old drip patch it lightened the stain noticeably in a single application, though as with every surface cleaner it could not reach the oil sitting deeper in the slab — that is a limitation of the mechanism rather than the product. Dilution flexibility is genuinely useful: the same jug handles a light garage cleanup at high dilution and heavy grease at full strength, and it works just as well on tools and engine parts, which means it does not sit unused between concrete projects. Being water-based and biodegradable, there are no solvent fumes to manage and no special disposal considerations for the rinse water beyond the usual rule of keeping it out of storm drains. The one technique note that matters: it needs to dwell wet on the surface for 10-15 minutes and it needs actual scrubbing with a stiff brush. Spray-and-rinse use produces disappointing results and is the source of most negative reviews.
Pros
- Removed the surface film from every stain we tested it on, including a two-year-old drip
- Dilutes for different jobs, so one jug covers everything from light cleanup to heavy grease
- Water-based and biodegradable — no solvent fumes and safe around planted beds when rinsed properly
- Works on tools, engine parts, and concrete equally well, so it earns its shelf space
- Very cost-effective per treated square foot at working dilution
Cons
- Cannot pull oil from deep within the slab — it cleans what it can reach
- Needs a genuine dwell time and scrubbing; spraying and rinsing accomplishes little
The Bottom Line
The degreaser to keep on the shelf. It handles fresh spills completely and prepares old stains for poultice treatment.
Terminator-HSD Microbial Oil Remover
Microbial / Bioremediation
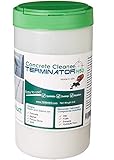
Bioremediation sounds like a gimmick until you use it on a stain nothing else has touched. Terminator-HSD is a granular product carrying microbial cultures that metabolize hydrocarbons, converting oil into carbon dioxide and water. You spread it over the stain, wet it, and keep it damp — and then you wait. In our testing on a five-year-old drip patch under a truck, a stain that two poultice cycles had barely improved, this produced the most visible progress of anything we tried, lightening it substantially over about two and a half weeks of periodic wetting. The reason is mechanical: microbes travel into the concrete with moisture and work on oil at depths that a poultice's capillary pull cannot reach. There is also nothing to clean up afterward, which is a real practical advantage — no solvent disposal, no scraping dried paste, and it is entirely safe around plants, pets, and storm drains. The trade-off is time, and it is not a small one. This is a one-to-three week project requiring you to remember to wet the area every couple of days, and if it dries out completely the process stalls. For a fresh spill it is the wrong tool entirely. For a driveway with years of accumulated drips that you have already tried everything on, it is the one thing that still has room to work.
Pros
- Reaches oil deeper in the slab than any poultice or degreaser can pull from
- Nothing to scrub, rinse, or dispose of — the microbes consume the oil entirely
- Produced the most improvement of anything we tested on a five-year-old drip patch
- Completely safe around plants, pets, and storm drains
- Reapplication is simple and it keeps working with each cycle
Cons
- Slow — meaningful results take one to three weeks of keeping the area damp
- Requires consistent moisture; it stops working if the area dries out completely
The Bottom Line
The only thing we tested that made real progress on a five-year-old stain. Patience is mandatory, but nothing else reaches that deep.

Pour-N-Restore Oil Stain Remover
Ready-Mixed Poultice
The poultice is the best technique for old oil stains, and mixing one yourself means handling acetone or xylene — genuinely effective, genuinely flammable, and not something everyone should be doing in a closed garage. Pour-N-Restore packages the same mechanism in a ready-mixed, water-based form: you pour it over the stain, it soaks in and dissolves the oil, then dries into a white powder that carries the extracted oil up with it as it cures. Sweep the powder away and the oil goes in the dustpan. In our testing on a stain roughly four months old, one application produced clear, obvious lightening, and a second cycle took it to a faint shadow that we expected to weather away over a season. The absence of solvent handling is the real selling point — no fumes, no ignition sources to worry about, no leftover thinner to store. Application is genuinely simple enough that the failure mode is impatience rather than technique. The two honest drawbacks are cost and weather. Per square foot it is considerably more expensive than diatomaceous earth and a can of acetone, so a large driveway gets pricey fast. And because the drying phase is where extraction happens, you need a dry multi-day window outdoors; rain partway through the cure interrupts the process and you start over.
Pros
- Pre-mixed poultice — no solvent handling, no measuring, no mixing paste
- Dries to a powder you simply sweep up, with the extracted oil in it
- Genuinely effective on months-old stains, with visible lightening after one application
- Water-based formula avoids the fume and fire risk of DIY solvent poultices
- Very easy to reapply for additional cycles on stubborn stains
Cons
- Expensive per square foot compared to mixing your own poultice
- Needs dry weather across a multi-day cycle, so timing matters outdoors
The Bottom Line
The poultice method without the solvent handling. Costs more than DIY, and for most homeowners that is money well spent.

Food-Grade Diatomaceous Earth
DIY Poultice Absorbent
If you are willing to mix your own poultice, diatomaceous earth is the base to use, and the economics are hard to argue with — a single inexpensive bag treats a large driveway across several full poultice cycles, at a fraction of the per-square-foot cost of any pre-mixed product. Its absorbency comes from structure: DE is fossilized diatom skeletons, an enormously porous material with far more internal surface area than clay or flour, which is exactly what a poultice needs to hold dissolved oil as it dries. In our testing, a DE-and-acetone poultice matched the commercial ready-mixed products cycle for cycle on a months-old stain, and cost a small fraction as much. It doubles as a dry absorbent for fresh spills, so a bag in the garage covers both scenarios. What you are taking on is the solvent handling. Acetone, lacquer thinner, and xylene are flammable, produce fumes that require real ventilation, and demand nitrile gloves and eye protection — this is outdoor work with no ignition sources nearby, and it is not appropriate for everyone. The DE dust itself also warrants a mask while mixing, since fine particulate is an irritant. Handle those two things properly and this is the best value in oil stain removal by a wide margin.
Pros
- The most absorbent poultice base available, and extremely inexpensive per application
- Works as both a dry absorbent for fresh spills and a poultice base for old stains
- One bag treats a large driveway across multiple poultice cycles
- Non-toxic and safe to handle, unlike the solvents it gets mixed with
- Also useful around the garden and for garage cleanup, so nothing goes to waste
Cons
- Only half the system — you supply and safely handle the solvent yourself
- Fine dust requires a mask during mixing to avoid respiratory irritation
The Bottom Line
The cheapest effective route for anyone comfortable handling solvents. A bag of this and a can of acetone outperforms most commercial products per dollar.

Krud Kutter Concrete Cleaner & Degreaser
Water-Based Concrete Degreaser
There is a specific job that most degreasers do badly: cleaning concrete thoroughly enough that a sealer or epoxy coating will actually bond to it. Many cleaners leave a surfactant film that interferes with adhesion, causing coatings to fail in patches months later. Krud Kutter's concrete formulation rinses cleanly, which is why it is our pick for pre-coating preparation. In testing it handled the general grime, tire marks, and light oil shadows that accumulate on a garage floor, and it lifted rust staining that the general-purpose degreasers left behind. Odor is low enough to work in a garage with the door open, and being water-based there is no solvent handling involved. On stains older than a few months it behaved like every surface cleaner does — improving the appearance without reaching the oil below — so this is not a substitute for a poultice on a deep stain. The workflow that makes sense is sequential: poultice or microbial treatment first to pull out what is extractable, then Krud Kutter as the final preparation pass before sealing. As with all degreasers, it needs actual dwell time and a stiff brush; spraying and immediately rinsing wastes the product and produces the disappointing results that show up in the occasional negative review.
Pros
- Formulated specifically for concrete rather than adapted from a general cleaner
- Strips residue thoroughly enough to prepare a slab for sealer or coating
- Low odor and water-based, usable in a garage with the door open
- Effective on tire marks and rust shadows as well as oil
- Rinses cleanly without leaving a film that would interfere with adhesion
Cons
- Less effective than dedicated poultices on stains older than a few months
- Best results need a scrub brush and dwell time, not just a spray-down
The Bottom Line
The right degreaser when the real goal is a clean slab ready to seal or coat. Rinses without residue, which matters more than raw cleaning power here.
6. How Clean Can Concrete Actually Get?
This is the part most guides avoid, and it matters for deciding when to stop spending weekends on a stain.
Fresh spills handled within the first hour usually come out to invisible. This is the strongest argument for keeping absorbent in the garage.
Stains a few weeks old typically clean up 80-95% with two or three poultice cycles, leaving a faint shadow that fades further over months of weathering and UV exposure.
Stains years old, particularly on unsealed concrete under a vehicle, generally reach 50-80% improvement. Oil that has been in the slab for years has migrated deep enough that some of it is simply not recoverable. Repeated poultices plus a microbial treatment gets the most out of it, but expect a visible difference rather than a perfect slab.
Know When to Switch Strategies
If two full poultice cycles produce no further lightening, the remaining oil is beyond extraction. At that point your options are to accept it, resurface with a concrete overlay, or apply an opaque coating like a garage floor epoxy — but note that oil-contaminated concrete is a poor bonding surface, so it must be degreased thoroughly and often mechanically ground before any coating will adhere.
A Note on Coatings Over Old Oil
Epoxy and other coatings fail on oil-contaminated concrete — the oil prevents adhesion and the coating delaminates in sheets within a year or two. If a coating is your plan, budget for thorough degreasing plus mechanical grinding or shot blasting to remove the contaminated surface layer, and expect the installer to test adhesion before proceeding.
7. Preventing the Next Oil Stain
Everything above is remedial. The prevention side is cheap and takes an afternoon.
Seal the Concrete
A penetrating siloxane or silane sealer soaks into the surface and lines the capillary pores, dramatically slowing oil penetration and buying you the time to absorb a spill. It does not change the appearance of the slab and typically lasts 5-10 years. This is the single highest-value preventive step for a driveway or garage floor, and it costs a fraction of what stain removal takes in weekends.
Keep Absorbent Where the Spill Will Happen
A bag of clay oil absorbent in the corner of the garage is a few dollars and turns a permanent stain into a thirty-minute cleanup. The determining factor in oil stain outcomes is almost always how quickly something got poured on it.
Use a Containment Mat Under a Leaking Vehicle
If a vehicle drips persistently, an absorbent parking mat or even a sheet of cardboard swapped monthly costs almost nothing and prevents the years-deep contamination that never fully comes out. This is the difference between a stain you can remove and one you cannot.
Treat New Stains Immediately
The cost of dealing with an oil stain roughly multiplies with every week it sits. A spill treated the same day takes thirty minutes and a bag of absorbent; the same spill in a year takes multiple poultice cycles across several weekends and still leaves a shadow.
8. Frequently Asked Questions
How do you get old oil stains out of concrete?
Use a poultice. Mix an absorbent like diatomaceous earth with a solvent such as acetone or mineral spirits into a peanut-butter-thick paste, spread it half an inch thick over the stain, cover with taped plastic for 24 hours, then uncover and let it dry completely. The drying phase pulls dissolved oil up out of the concrete. Deep stains usually need two to four cycles.
Does Dawn dish soap remove oil from concrete?
It works better than expected on fresh, light spills because it is a strong surfactant that emulsifies oil. Scrub it in with hot water, let it dwell 10-15 minutes, and rinse. It does nothing for oil that has already soaked into the slab, which is most stains older than a day or two.
Will a pressure washer remove oil stains from concrete?
Not on its own. Pressure washing removes surface oil and drives the rest deeper while spreading it across a wider area. Use it as a final rinse after a degreaser or poultice has done the actual work, never as the first step on a fresh spill.
Can you get oil stains out of concrete completely?
It depends on age. A spill treated within the first hour usually comes out to invisible. A stain a few weeks old typically cleans up 80-95% with two or three poultice cycles. A years-old stain generally reaches 50-80% improvement, because some of the oil has migrated too deep to extract.
Does WD-40 or Coca-Cola remove oil from concrete?
No. Coca-Cola is mild phosphoric acid with no affinity for oil and no extraction mechanism — it is a persistent myth. WD-40 is itself a petroleum product, so you are adding oil to an oil stain. Skip both.
What is the best product to remove oil from concrete?
For fresh spills, clay absorbent followed by Oil Eater degreaser. For stains a few weeks to months old, a poultice — Pour-N-Restore if you want it pre-mixed, diatomaceous earth plus acetone if you are comfortable with solvents. For years-old stains, a microbial cleaner like Terminator-HSD reaches deepest, though it takes weeks.
How do you keep oil from staining concrete in the first place?
Apply a penetrating silane or siloxane sealer, which lines the capillary pores and buys you time to absorb a spill before it soaks in. Keep a bag of clay oil absorbent in the garage, and put an absorbent mat or cardboard under any vehicle that drips persistently. Sealing is the highest-value step and typically lasts 5-10 years.
9. Mistakes That Make Oil Stains Worse
Several common first reactions actively make the stain harder to remove. These are the ones worth unlearning.
Wiping Instead of Blotting
Wiping a fresh spill spreads it over more surface area and presses oil into the pores. Lay towels flat, press down, lift, and replace. A small deep stain is far easier to remove than a large faint one.
Pressure Washing First
High-pressure water drives oil deeper into the slab and atomizes it across a wider area. Absorb first, degrease second, and use the pressure washer only at the end to rinse away what has been loosened.
Using Muriatic Acid
Acid dissolves cement paste, not oil. It etches away the surface, which can make a stain look lighter while permanently roughening the concrete, exposing aggregate, and leaving the slab more absorbent and more prone to staining next time.
Giving Up After One Poultice Cycle
Poultices work incrementally, and a deep stain typically needs two to four passes. Each cycle visibly lightens the stain. Stop when a full cycle produces no further improvement — that is the point where the remaining oil is genuinely beyond extraction, not the point after the first attempt.
Coating Over Oil-Contaminated Concrete
Epoxy and other coatings will not bond to oil-soaked concrete and delaminate in sheets within a year or two. If a coating is the plan, the slab must be degreased thoroughly and usually mechanically ground to remove the contaminated surface layer first.
Related Concrete Guides
Buyer's Guide
Best Oil Stain Remover for Concrete
Every product category tested head to head on fresh and set-in stains.
Buyer's Guide
Best Concrete Sealer
Sealing is the single best way to stop the next stain from soaking in.
Buyer's Guide
Best Driveway Cleaner
For general grime, tire marks, and rust — the cleaners worth using before sealing.
The Bottom Line
The method that works depends entirely on age. Fresh spills need dry absorbent within the first 30 minutes, followed by a degreaser — handled that way they usually disappear completely. Older stains need a poultice, because it is the only method that reverses the direction of travel and pulls oil back up out of the slab. Expect two to four cycles, and expect visible improvement each time.
For a stain that has been there for years, a microbial cleaner reaches deeper than anything else, though it takes weeks. And once the slab is clean, seal it — a penetrating sealer costs an afternoon and turns every future spill into a thirty-minute cleanup instead of a project.
More in Driveway & Concrete Sealers
Guides in this category that pair with what you just read.
About the Author
Alex Rivers, Home Improvement Editor
Alex has spent over a decade working on residential and light commercial property maintenance, and now tests every tool, coating and machine that appears in these guides personally.