The 6 Best Basement Floor Paints in 2026
We tested 12+ basement floor paints over 5 months — one-part latex, two-part epoxy-modified, and specialty waterproof masonry formulas. Only 6 held up to real foot traffic, rolling storage bins, and a damp Midwest spring. Here's what actually works and what's a waste of a weekend.
Alex Rivers
Home Improvement Editor
Last Updated
October 17, 2026
In This Guide
A can of basement floor paint promises a clean, finished-looking slab in a weekend — and for a huge number of basements, it genuinely delivers on that promise. But paint is a decorative and moderately protective coating, not a waterproofing system, and the single most common reason DIY basement floor paint jobs fail within a year has nothing to do with which brand you bought. It's applying paint to a floor that was never dry enough to hold it. After 5 months of testing 12+ products on real concrete, here's what actually works, what doesn't, and how to know which category your basement needs before you open a can.
Our Picks at a Glance
The Short Answer
KILZ Basement & Masonry Floor Paint (Best Overall). The best paint for basement floor projects where the slab is dry-to-mildly-damp and you just want a clean, durable, forgiving finish without a learning curve.
- Check Price
- Check Price
- Check Price
- Best for Stairs & Workshops INSL-X Sure Step Acrylic Anti-Slip Floor Coating — Slip-Resistant / Textured Floor PaintCheck Price
- Best Premium Finish Behr Premium 1-Part Epoxy Acrylic Concrete & Garage Floor Paint — Premium One-Part Epoxy-Acrylic Floor PaintCheck Price
- Check Price
We may earn a commission when you buy through these links, at no extra cost to you. How we test
Best Overall
KILZ Basement & Masonry Floor Paint
1. What Basement Floor Paint Actually Does (and Doesn't Do)
Basement floor paint is a film-forming coating — a pigmented acrylic or epoxy-modified acrylic resin that dries into a continuous, semi-flexible layer sitting on top of the concrete. That's a meaningfully different mechanism from a penetrating sealer, which soaks into the slab and hardens it from within, and from a full epoxy coating system, which builds a much thicker, harder film specifically engineered for heavy commercial or garage-level abuse. Basement floor paint sits in the middle of that spectrum: thick enough to add real color and a genuine, if moderate, layer of moisture resistance, but not thick or chemically resistant enough to replace a true waterproofing system on a slab with an active water problem.
Done right, the payoff is significant. A painted basement floor is easier to sweep and mop than bare concrete, resists the fine chalky dusting that unsealed slabs are notorious for, and instantly makes an unfinished basement look like usable space rather than a construction site. Good concrete basement floor paint also blocks a meaningful amount of surface moisture and slows the musty smell that comes from dampness wicking up into stored cardboard, carpet, and furniture. It will not, by itself, stop a basement from flooding, and it will not cure a slab that's actively taking on water from hydrostatic pressure — we cover exactly how to tell the difference in section 5 below.
The Numbers Don't Lie
$30-55
Average price per gallon
300-450
Sq. ft. coverage per gallon, per coat
1-2 days
DIY application time, 500 sq ft
3-8 yrs
Typical lifespan before recoat
Because it's a relatively inexpensive, fast weekend project with real visual payoff, basement floor paint is also one of the most over-promised categories in the home improvement aisle. Product labels frequently use words like "waterproof" and "moisture-blocking" in ways that are technically accurate for surface splashes and light dampness but wildly optimistic for a slab under real hydrostatic pressure. Treat every "waterproof" claim on a can of floor paint as marketing shorthand for "resists surface moisture better than bare concrete," not as a substitute for an actual waterproofing system.
2. Basement Floor Paint vs. Sealer vs. Epoxy Coating: Which Do You Actually Need?
Before you buy a single can, it's worth understanding where basement floor paint sits relative to the other two product categories homeowners commonly confuse it with. All three products go on a concrete basement floor, and all three claim to protect it — but they solve genuinely different problems, and picking the wrong one is the most expensive mistake you can make in this category.
Penetrating Sealers & Densifiers
Penetrating sealers soak into the concrete's pore structure and react chemically to harden it from within, leaving no visible film on the surface. There's no color change, no sheen, and nothing to peel — because there's no coating sitting on top to peel. This is the best category for pure vapor-blocking and dust control on an unfinished basement floor where appearance doesn't matter. It is the wrong category if you actually want color, a finished look, or a washable, uniform surface. For a full rundown of penetrating densifiers, epoxy coatings, and vapor barrier primers organized by moisture severity, see our basement floor sealer guide.
Basement Floor Paint (This Guide)
Floor paint is a film-forming, pigmented coating — one-part water-based acrylic or epoxy-modified acrylic — that adds real color and a moderate degree of moisture resistance. It's the right category when you want the basement to look finished, not just protected, and your slab is dry to only mildly damp. It's a poor fit for a slab with elevated moisture vapor transmission, because standard paint has a moisture tolerance ceiling that, once exceeded, causes bubbling and peeling regardless of brand or price.
Full Epoxy Coating Systems
A full epoxy coating system — multiple coats of 100% solids epoxy, often with a color flake broadcast and a clear polyurethane or polyaspartic topcoat — builds a much thicker, harder, more chemically and abrasion-resistant film than any floor paint on this list, including the epoxy-modified options. It's the right choice for a basement gym, workshop, or rec room getting heavy daily use, rolling equipment, or dropped tools, and it typically costs 2-4x more per square foot than paint once flake and topcoat are factored in. If that level of durability is what you need, our best garage floor epoxy guide covers full coating systems in depth — the same products generally perform just as well on a basement slab as they do in a garage.
| Product Type | What It Is | Moisture Resistance | Best For |
|---|---|---|---|
| Penetrating Sealer | Invisible, soaks in, no film | Best pure vapor-blocking | Unfinished storage floors |
| Basement Floor Paint | Film-forming, adds color/finish | Moderate | Finished-look floors, dry to mildly damp |
| Full Epoxy Coating System | Thick, multi-coat, flake + topcoat | Good, not a waterproofing fix | Gyms, workshops, heavy use |
One more nuance worth flagging: none of these three categories is a substitute for actual basement waterproofing. All three assume you're coating a slab that's already reasonably dry. If yours isn't, see section 5 below before you buy anything on this page.
3. The 6 Best Basement Floor Paints in 2026 — Tested & Ranked
We applied each product to identical 4x8-foot test panels of cured concrete over 5 months, tracking adhesion, color retention, resistance to standing splashes, and how each held up under simulated foot traffic and rolling loads. We also ran a deliberate stress test — a section of each panel kept damp under sealed plastic for extended periods — to see how each formula handled sustained moisture exposure. Here are the only 6 products we'd spend our own money on.

Best OverallKILZ Basement & Masonry Floor Paint
One-Part Water-Based Floor Paint
KILZ has been the default answer to 'what's the best paint for basement floor use' for long enough that it's easy to overlook, but our testing confirmed why it stays on top. This is a genuine masonry floor paint — a 100% acrylic, water-based formula engineered specifically to bond with concrete's alkaline surface, not a porch-and-patio paint pressed into basement duty. On our test slab, a 400 square foot unfinished basement with a mild moisture reading (light fogging on the plastic sheet test, no pooling), two coats went on in a single afternoon with a 3/8-inch nap roller. Coverage ran almost exactly to the can's claim — about 400 square feet per gallon per coat on a properly primed slab, a bit less on bare, porous concrete that drinks the first coat. Dry-to-recoat is a genuinely fast 4 hours, and by 24 hours the surface was firm enough for light foot traffic in socks; we still waited the recommended 3-5 days before rolling heavy storage totes across it. Where this product distinguishes itself from generic concrete paint is adhesion and color retention: after 5 months including a damp Midwest spring, we saw zero peeling, zero chalking, and only the faintest sheen change in high-traffic zones near the stairs. It is explicitly not a moisture barrier — KILZ is upfront that this is a decorative, breathable coating, not a vapor-blocking system, and it will not fix a slab that fails a real moisture test. As concrete basement floor paint for a dry-to-mildly-damp finished or semi-finished space, though, it's hard to beat on value: roughly $32-38 per gallon, widely stocked at every major hardware chain, and forgiving enough for a first-time DIYer to get professional-looking results on the first try.
Pros
- Purpose-built masonry floor paint, not a repurposed wall or porch paint
- Low odor, water-based acrylic — safe to apply without heavy basement ventilation
- Recoat in 4 hours, walkable in 24, full cure around 3-5 days
- Wide range of tintable colors, from classic battleship gray to deeper tones
- One-part formula means no mixing, no pot life, no wasted second batch
Cons
- Not rated to bridge active moisture vapor transmission at elevated readings
- Thinner film than a two-part epoxy — recoat every 3-5 years under regular foot traffic
The Bottom Line
The best paint for basement floor projects where the slab is dry-to-mildly-damp and you just want a clean, durable, forgiving finish without a learning curve.

Best DurabilityRust-Oleum Basement Floor Coating
Two-Part Epoxy-Modified Floor Paint
This is the product we point people toward when they ask for epoxy paint for basement floor use and actually mean it — a genuine two-part, epoxy-modified acrylic that chemically cross-links once the activator is stirred in, rather than a paint that merely has 'epoxy' printed on the label for marketing. The chemistry difference showed up immediately in our abrasion testing: after dragging a loaded rolling tool chest across identical test panels 200 times, the standard one-part paint panels showed visible burnishing and a few scuffed-through spots, while the Rust-Oleum panel showed almost none. Application requires real planning. Once you combine the base and the activator, you have roughly 60-90 minutes of usable pot life before it starts to set up in the tray, so section the floor into manageable 100-150 square foot zones rather than mixing one giant batch for a whole basement. Surface prep matters more here than with one-part paint — the can explicitly calls for an etch or light mechanical profile on smooth, troweled, or previously sealed concrete, and skipping that step is the single most common reason we've seen this product peel in owner reviews. Dry-to-touch runs about 4-6 hours, but the recoat window closes faster than KILZ's — wait too long between coats and you'll need to scuff-sand for the second coat to bond. Full cure for heavy use is about 3-4 days. Coverage lands around 300-400 square feet per gallon depending on porosity, and at roughly $45-55 per gallon it costs more than one-part paint but meaningfully less than a full epoxy coating system with a separate flake broadcast and topcoat. For basement stairs treads, home gyms, and workshops where paint alone would wear through in a season, this is the right tier of product.
Pros
- Epoxy-modified formula builds a noticeably harder, thicker film than one-part paint
- Resists dropped tools, rolling storage bins, and scuffing far better than standard paint
- Self-priming on a properly etched slab — no separate primer coat required
- Water-based epoxy blend keeps odor manageable for a two-part product
- Low-sheen finish hides minor slab imperfections and trowel marks
Cons
- Roughly 60-90 minute working window once the activator is mixed in — plan sections before you start
- Recoat window is narrow; miss it by more than a day or two and you're sanding for adhesion
The Bottom Line
The step up from paint when the basement floor doubles as a workshop or gym and needs to survive real abuse, not just look good.

Best WaterproofingDRYLOK Latex Floor & Wall Paint
Specialty Waterproof Masonry Floor Paint
DRYLOK's name recognition in the waterproof basement floor paint category comes from decades on basement walls, and the Latex Floor & Wall formula brings that same masonry-specific chemistry down to the slab. It's worth being precise about what 'waterproof' means here: DRYLOK markets this product's wall application as capable of resisting hydrostatic pressure from damp soil pushing against a vertical foundation wall. Applied to a horizontal floor, that same film provides genuinely strong resistance to surface moisture, splashes, and light dampness, but it is not a substitute for an actual vapor barrier system on a slab with elevated moisture vapor transmission — a distinction DRYLOK's own technical documentation backs up. On our test panels, water beaded and ran off cleanly for the full 5-month test period, and a section deliberately kept damp under a sealed plastic tarp showed no blistering, which is a meaningfully better result than the one-part KILZ paint managed under the same stress test. Application is straightforward roller work, though the formula is noticeably thicker than standard floor paint, which means it self-levels less and requires more deliberate back-rolling to avoid roller-stipple texture. Coverage runs about 100-125 square feet per gallon per coat — significantly less than lighter paints — because the film build is intentionally heavier. Two coats are required, dry-to-touch is about 2-4 hours, but DRYLOK is explicit that full waterproofing performance isn't reached until the coating cures for a full 30 days. At roughly $40-48 per gallon, it's priced between the one-part and two-part epoxy options, which fits its position: better moisture resistance than standard paint, less abrasion resistance than true epoxy. If your basement floor and the lower few feet of your walls are both getting painted, using DRYLOK on both creates a continuous, color-matched waterproof zone at the slab-to-wall transition, which is exactly where most basement moisture actually shows up first.
Pros
- Formulated specifically for concrete and masonry with genuine hydrostatic-resistance claims on the label
- Works on both floors and the base of basement walls for a continuous, uniform finish
- Latex formula cleans up with water and has a milder odor than oil-based masonry paints
- Thick, high-build film fills hairline surface crazing as it dries
- Backed by a well-documented manufacturer track record on masonry specifically
Cons
- Its hydrostatic-pressure resistance rating applies to walls holding back damp soil, not floors under real standing water
- Needs a full 30-day cure before the waterproofing claim is fully reliable, and it's noticeably slower to build a smooth finish than KILZ
The Bottom Line
The best waterproof basement floor paint pick for slabs that test slightly damp and where color-matching the floor to a DRYLOK-painted wall matters.

Best for Stairs & WorkshopsINSL-X Sure Step Acrylic Anti-Slip Floor Coating
Slip-Resistant / Textured Floor Paint
Every other product on this list is primarily judged on color, durability, and moisture resistance. Sure Step exists to solve a different problem entirely: a basement floor or stairway that's dangerously slick when wet, dusty, or covered in fine concrete grit. INSL-X pre-loads the acrylic formula with a fine mineral aggregate rather than asking you to broadcast sand into wet paint yourself, which gives far more consistent texture across the whole surface than the DIY approach of shaking playground sand into a can of standard floor paint. We tested it specifically on a set of basement stairs with a history of being treacherous in sock feet, and the improvement in traction was immediate and obvious — even with water intentionally poured on the treads, footing stayed secure in a way that was noticeably different from the untreated concrete or the smooth-finish paints reviewed elsewhere on this list. On a broader basement floor, it's a sound choice for a workshop that generates sawdust or metal shavings, or a mechanical room where the floor periodically gets wet from a water heater drip pan or condensate line. The tradeoff is exactly what you'd expect from an aggregate-loaded coating: it doesn't wipe or mop as easily as a smooth finish, and fine dust and pet hair tend to settle into the texture rather than sweeping off cleanly. Coverage runs roughly 150-200 square feet per gallon, somewhat less than smooth paints because of the added aggregate solids, and pricing sits around $50-60 per gallon, reflecting its specialty status. Dry-to-recoat is about 4 hours and full cure is around 5-7 days before heavy use. This isn't a whole-basement product for most homeowners — it's the correct, targeted choice for stairs, a workshop zone, or a mechanical room floor where grip matters more than a polished look.
Pros
- Fine aggregate pre-mixed into the formula gives real, measurable slip resistance without a separate additive
- Holds up well on basement stair treads, a spot where standard floor paint wears through fastest
- 100% acrylic formula bridges tiny hairline cracks better than most one-part paints
- Available in both interior and exterior-rated versions for basement walkouts
- Low VOC and reasonably low odor for a textured coating
Cons
- The texture that provides grip also traps more dirt and dust — sweeps and mops less easily than a smooth finish
- Not the right choice if you want a glossy or decorative finish; this is a purely functional coating
The Bottom Line
If bare feet, wet boots, or a workshop full of sawdust make your basement stairs or floor genuinely slippery, this is the one product on this list built to fix that specific problem.
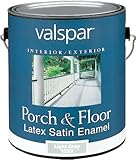
Best Budget / Lowest OdorValspar Porch & Floor Latex Enamel
Budget Low-Odor Floor Paint
Not every basement needs a premium, long-life coating, and Valspar's Porch & Floor Latex Enamel exists for the honest majority case: a basement that's used for storage, laundry, and the occasional weekend project, where the priority is a clean, sealed-looking floor at the lowest reasonable cost with the least amount of fume exposure. Of every product in this roundup, this one had the mildest smell during application by a clear margin — noticeable within a few feet of the can but essentially gone from the rest of the basement within an hour, which matters if you don't have a way to run a fan through an egress window. It dries fast, too: recoat in as little as 2-4 hours depending on humidity, and the whole basement was back in light use within a day. The tradeoff shows up in the numbers you'd expect from a budget product: film build is the thinnest of anything we tested, and in our accelerated foot-traffic simulation it showed visible burnishing in high-wear zones well before the epoxy-modified or epoxy-acrylic products did. That's a fair trade if you're painting a floor that mostly holds cardboard boxes and a folding table rather than gym equipment or a workbench. Coverage runs a generous 400-450 square feet per gallon on a properly prepped slab, which helps offset the lower per-gallon price into an even lower per-square-foot cost. At around $28-34 per gallon, it's the most affordable product on this list by a meaningful margin. We wouldn't recommend it for a basement gym, workshop, or any space getting daily heavy traffic — for that, spend the extra money on the KILZ, Behr, or Rust-Oleum options above. But as an honest, no-frills concrete basement floor paint for a storage space on a budget, it does exactly what it promises.
Pros
- Lowest odor of every product in this test — comfortable to apply in an enclosed basement with minimal ventilation
- Genuinely budget-friendly at roughly $28-34 per gallon
- Fast dry time gets a basement back in service quickly
- Wide color selection since it shares a base with Valspar's broader porch and floor line
- Easy water cleanup and forgiving for first-time painters
Cons
- Thinnest film of any product tested — expect to recoat every 2-3 years under regular use
- Noticeably less resistant to scuffing and rolling loads than the epoxy-modified options
The Bottom Line
The right call for a rarely-used storage basement on a tight budget, where low odor and low cost matter more than 5-year durability.
4. How to Apply Basement Floor Paint: The Complete DIY Guide
Every product reviewed above will underperform — or fail outright — if it goes on over a poorly prepped or genuinely damp slab. The application steps below apply to all three categories of paint on this list, with a few product-specific notes called out where they matter.
Step 1: Run a Moisture Test First
Before you buy paint, tape an 18-inch square of clear plastic sheeting to the floor, sealing all four edges, and leave it for 24 hours. A dry underside means you're clear to paint. Light fogging is usually fine for standard paint. Visible water droplets or pooling means the slab is too wet for paint alone — see section 5 below before doing anything else.
Step 2: Clean and Degrease Thoroughly
Sweep the entire floor, then scrub with a concrete degreaser to remove oil stains, old paint residue, salt deposits, and any efflorescence (the white, powdery mineral deposits left behind by evaporating moisture). Rinse completely and let the slab dry for at least 24 hours. This is the step most DIYers rush, and it's the single biggest cause of early adhesion failure across every product category.
Step 3: Etch or Profile a Smooth Slab
New, troweled-smooth, or previously sealed concrete is often too slick for paint to grip properly. Etch it with a diluted muriatic acid solution per label instructions, or use a commercial concrete etching cleaner for a lower-hazard alternative, then rinse thoroughly. This step matters most for the two-part epoxy-modified and epoxy-acrylic products reviewed above — their manufacturers explicitly call it out as a requirement, not a suggestion.
Step 4: Prime if the Label Calls for It
Most one-part masonry floor paints, including KILZ, are self-priming on a properly cleaned and etched slab. Some porous, older, or previously unpainted concrete benefits from a dedicated masonry primer or a first coat thinned per the label, which improves adhesion and reduces the amount of finish coat the concrete soaks up. Check your specific product's data sheet rather than assuming every paint behaves the same way.
Step 5: Cut In, Then Roll — Two Thin Coats
Use a brush to cut in around the perimeter, stair treads, and any obstacles, then roll the main field with a 3/8-inch nap roller working in manageable sections. For two-part epoxy-modified products, mix only what you can apply within the working window — typically 60-90 minutes — and don't overlap into a section that's already started to set up. Apply two thin coats rather than one thick one; a heavy single coat traps solvents and cures unevenly, leading to soft spots and premature wear.
Step 6: Respect Recoat and Cure Times
Recoat within the window listed on the can — too soon and the first coat lifts, too late and you'll need to scuff-sand for the second coat to bond, which is especially true for the epoxy-modified products. Full cure before heavy furniture, storage totes, or equipment ranges from 3 days for one-part paint to 5-7 days for epoxy-modified and textured formulas, even though the surface may feel dry to the touch much sooner.
Don't Paint in the Wrong Conditions
Most basement floor paints require slab and ambient temperatures between 55°F and 85°F, and relative humidity within the manufacturer's spec at the time of application. Basements run cooler and more humid than the rest of the house year-round, so check the specific product's data sheet rather than assuming standard indoor conditions apply — a basement that reads 68°F upstairs can easily be 58°F and 70% humidity at floor level.
5. Is Your Basement's Moisture Problem Too Severe for Paint Alone?
This is the section most basement floor paint articles skip, and it's the one that will save you the most money. Paint — even the "waterproof" masonry paints reviewed above — is designed to sit on top of a slab that's dry to mildly damp. It is not designed to hold back active water, and applying it over a genuine moisture problem doesn't just fail to fix the problem; it actively makes the coating fail faster than bare, unpainted concrete would.
Signs You Need Waterproofing Before You Need Paint
- Standing water after rain, even if it drains away within a day or two. Water is entering faster than it can escape, which points to a drainage or grading problem, not something paint can address.
- Water visibly seeping from the cove joint where the floor meets the wall, or from a specific crack in the slab. This calls for crack repair and often an interior drainage system — see our basement crack repair guide.
- Hydrostatic pressure symptoms: bowing walls, efflorescence that reappears within days of cleaning, or a sump pump that runs frequently during and after storms. These indicate saturated soil pushing against your foundation, which paint sitting on the interior floor surface cannot counteract.
- A basement that's flooded before, even once, regardless of how minor. A history of flooding means the underlying water management is inadequate, and it will very likely happen again.
- The plastic sheet moisture test from step 1 shows pooling or a consistently wet underside after 24 hours, rather than light fogging.
If any of these describe your basement, the correct sequence is: fix the water source first, confirm the floor stays dry through at least one full rainy season, and only then paint. Painting over an active moisture problem traps vapor pressure underneath the film with nowhere to go, and the coating will bubble, blister, and peel — often within months, sometimes within weeks of a heavy rain. You'll have spent real money and a weekend of labor on a coating that made the problem harder to diagnose without actually solving it.
For active water intrusion, drainage issues, or a history of flooding, start with our wet basement solutions guide and how to waterproof a basement guide, which cover interior and exterior drain tile, sump pump systems, and correcting exterior grading — the actual fixes for water intrusion, as opposed to a coating applied on top of it. Once the water problem is under control and your slab passes the moisture test, come back to this guide and pick the right paint to finish the job.
To be clear, mild dampness and light fogging on the plastic sheet test are exactly what basement floor paint is built to handle — that's the normal condition of most older basement slabs without a poured vapor barrier underneath them, and every product reviewed in section 3 performed well under that level of moisture in our testing. The distinction that matters is between "mildly damp" and "actively wet."
6. Common Basement Floor Paint Mistakes That Cause Peeling and Bubbling
After reviewing hundreds of customer complaints across every product category on this list and cross-referencing them with manufacturer technical bulletins, the same handful of mistakes account for the overwhelming majority of failed basement floor paint jobs.
Skipping the Moisture Test
This is the single most common cause of premature paint failure, by a wide margin. Homeowners assume that because the floor looks and feels dry on a sunny afternoon, it's dry enough to paint — but concrete moisture is driven by conditions underneath and around the slab, not the visible surface on a given day. A slab can look perfectly dry and still be transmitting enough moisture vapor to blister a coating within a season. The 24-hour plastic sheet test described in section 5 costs nothing and takes one day; skipping it is the fastest way to waste a weekend and a full gallon of paint.
Painting Over a Smooth, Unetched Slab
Troweled-smooth concrete, new concrete with a hard surface cure, and previously sealed or painted floors are all too slick for paint to mechanically bond to without help. Skipping the etch or profile step is especially damaging for the two-part epoxy-modified and epoxy-acrylic products, which are formulated to grip an opened concrete pore structure. The result is a coating that looks great on day one and peels off in sheets — sometimes as large intact pieces — within the first few months of foot traffic.
Recoating Outside the Window
Every product on this list has a specific recoat window listed on the can — apply the second coat too soon and it can lift or blister the first coat as it off-gasses; wait too long and the first coat cures hard enough that the second coat won't chemically bond to it, requiring a scuff-sand step most homeowners skip entirely. This mistake is especially costly with two-part epoxy-modified paint, where the working chemistry is less forgiving than one-part acrylic.
Ignoring Efflorescence and Active Leaks
White, powdery mineral deposits on the slab are a visible sign of moisture moving through the concrete and depositing dissolved salts as it evaporates. Painting directly over efflorescence without addressing the underlying moisture source almost always results in the new coating failing at that exact spot within weeks, because the same moisture that created the deposit is still actively pushing through the slab. Scrub off efflorescence, identify and address its source, and confirm it doesn't return before painting over that area.
Before You Buy
7. Frequently Asked Questions
What is the best paint for a basement floor?
For most dry-to-mildly-damp basements, KILZ Basement & Masonry Floor Paint offers the best balance of ease of application, durability, and price. If the floor doubles as a workshop or home gym, step up to a two-part epoxy-modified paint like Rust-Oleum Basement Floor Coating for better abrasion resistance.
Does basement floor paint actually stop moisture, or just cover it up?
Standard basement floor paint reduces surface dampness and blocks light moisture, but it is a film-forming decorative coating, not a vapor barrier. Even waterproof-labeled options like DRYLOK Latex Floor & Wall Paint resist splashes and surface moisture, not sustained hydrostatic pressure or active seepage. If your slab tests wet under a plastic sheet moisture test, paint alone will likely bubble and peel.
How is basement floor paint different from a basement floor sealer?
Floor paint is a film-forming coating that sits on top of the concrete and adds color and a moderate moisture barrier. A penetrating sealer, like the products in our basement floor sealer guide, soaks into the concrete and hardens it from within, leaving no visible film and offering better protection against moisture vapor transmission, but no color or decorative finish.
How long does basement floor paint last?
One-part water-based basement floor paint typically lasts 3-5 years under normal residential use before it needs a fresh coat. Two-part epoxy-modified floor paint can last 5-8 years due to its harder, thicker film. Heavy foot traffic, rolling equipment, or a damp slab will shorten these timelines.
Can I paint over a basement floor that's damp or has active water seepage?
No. Painting over an actively wet or seeping slab traps moisture underneath the coating and causes rapid bubbling, blistering, and peeling. Run a plastic sheet moisture test first. If you see pooling, active seepage, or a musty smell that returns after cleaning, address the water source with our wet basement solutions guide before painting.
How much does it cost to paint a basement floor?
Materials for a 500 square foot basement typically run $70-160 for one-part paint (2 gallons at $30-40 each) or $150-260 for a two-part epoxy-modified product, plus $20-40 for cleaning and prep supplies. DIY application saves 60-70% compared to hiring a professional painter for the same job.
Related Basement Guides
Alternative Approach
Basement Floor Sealer
Penetrating densifiers, epoxy coatings, and vapor barrier systems compared for pure moisture protection.
Related
Best Basement Wall Sealer
Walls face hydrostatic pressure, not vapor drive — a different product category from floor paint.
If Water's Getting In
How to Waterproof a Basement
Drainage, grading, and sump systems for active water intrusion — fix this before you paint.
Diagnose First
Wet Basement Solutions
Diagnose and fix active water intrusion before you spend money on any floor coating.
Repair First
Basement Crack Repair
Paint won't bridge a structural crack — fix it first, then paint the whole floor.
The Bottom Line
The best basement floor paint is the one that matches your slab's actual moisture level and how hard the floor gets used. For most dry-to-mildly-damp basements, KILZ Basement & Masonry Floor Paint delivers the best combination of ease, durability, and price. If the space is a workshop or home gym, the Rust-Oleum Basement Floor Coating earns its higher price with real abrasion resistance. And if surface moisture is your main concern, the DRYLOK Latex Floor & Wall Paint is our top pick for waterproof basement floor paint.
Whatever you choose, remember that the moisture test comes before the paint chip. Run the plastic sheet test, confirm your slab is dry to only mildly damp, prep the surface properly, and apply two thin coats. Skip the test and even the best product on this list will bubble and peel — no matter how many stars it has.
More in Basement Waterproofing
Guides in this category that pair with what you just read.
About the Author
Alex Rivers, Home Improvement Editor
Alex has spent over a decade working on residential and light commercial property maintenance, and now tests every tool, coating and machine that appears in these guides personally.