Best Concrete Crack Filler
Most failed crack repairs used a decent product in the wrong crack. Here is which filler belongs in a hairline, a half-inch gap and a joint that moves every winter.
Alex Rivers
Home Improvement Editor
Last Updated
September 29, 2026
In This Guide
A concrete crack filler has one job, and it is not to make the crack disappear. It is to keep water out of the slab while the crack keeps doing whatever it was going to do. A crack that opens and closes with the seasons needs something that stretches, a crack that has stopped moving can take something rigid, and a hairline needs something thin enough to get inside it. Pick the filler for the crack, not the other way round.
Our Picks at a Glance
- Best Overall: Sikaflex Self-Leveling Sealant — Self-Leveling Polyurethane, 10.1 or 29 oz
- Fastest Tack-Free: Quikrete Advanced Polymer Self-Leveling Sealant — Solvent-Free Self-Leveling Polymer, 10.1 or 29 oz
- Best for Vertical Cracks: Loctite PL Concrete Crack & Masonry Sealant — Non-Sag Textured Polyurethane, 10 oz
- Most Flexible: Sashco Slab Concrete Crack Repair — Water-Based Elastomeric Sealant, 10.5 oz
- Best for Hairline Cracks: Quikrete Concrete Crack Seal — Acrylic Latex Liquid, Squeeze Tube or Bottle
- Best for Static Cracks: PC Products PC-Concrete Two-Part Epoxy — 100% Solids Epoxy Paste, 8.6 oz Cartridge
- Best for Chips and Holes: Red Devil Pre-Mixed Concrete Patch — Acrylic Premixed Patch, 1 qt Tub
1. How We Picked and Tested
We started with the crack fillers that are actually stocked where homeowners shop, on Amazon and at the big-box stores, and narrowed them to products with published technical data. A filler that will not tell you its maximum joint depth, its movement capability or its cure time is asking you to guess, and guessing is how repairs end up peeling out of the crack by spring.
Each product was sorted by the job it is built for rather than ranked on a single scale. A self-leveling polyurethane and a two-part epoxy are not really competitors. One is designed to flex with a moving joint and the other is designed to bond a crack that has stopped moving into a single rigid piece. Scoring them against each other would be like comparing a hinge with a weld.
We filled a set of test cracks in an old garage apron and a patio slab: hairlines under a sixteenth of an inch, quarter-inch cracks, and a half-inch control joint that visibly opens in cold weather. We judged how easily each product went in, whether it self-leveled or needed tooling, how long it stayed tacky, and how the cured bead looked against weathered gray concrete.
Three things were weighted above everything else. Movement capability, because most outdoor slab cracks move and a rigid filler in a moving crack fails at the bond line. Adhesion to slightly dusty, imperfect concrete, because no homeowner prepares a crack like a lab technician. And honesty of the label, because a product that claims to fix every crack usually fixes none of them especially well.
Prices were checked across retailers but are not quoted here, because caulk-tube pricing moves constantly. Where a product costs meaningfully more per linear foot than the alternatives, we say so in its review.
2. Hairline, Wide or Moving: Diagnose the Crack First
Before you buy anything, spend five minutes on the crack itself. Three questions decide the product: how wide is it, how deep is it, and is it still moving. Getting those answers right matters far more than which brand you pick.
Hairline cracks, under 1/8 inch
Hairlines are usually shrinkage cracks from when the slab first cured, and most of them are cosmetic. The problem is that a thick caulk cannot get into them; it bridges the top, bonds to the dusty edges and peels off. A thin liquid filler that wicks into the crack is the right tool. Many hairlines do not need filling at all and are better protected by a penetrating sealer over the whole slab.
Wide cracks, 1/8 to 1/2 inch and beyond
This is the range where caulk-tube fillers do their best work. Anything deeper than about half an inch needs backer rod first so the sealant ends up the right thickness. Anything wider than roughly an inch and a half has stopped being a crack repair and become a patching or slab-replacement job.
Moving cracks
The simplest test is to draw a pencil line across the crack in summer and measure it again in midwinter. If the gap has widened, or one side has lifted, the crack is live. Moving cracks need a flexible sealant rated for joint movement. Epoxy and cement patches crack out of them within a season, often pulling a sliver of concrete off the edge as they go.
One more distinction matters. A crack where one side sits higher than the other is a displacement problem, not a gap problem. Filling it keeps water out, but it will not remove the trip hazard, so read our driveway crack repair guide before you commit to a fix.
3. Our 7 Top Picks
The seven fillers below are grouped by the crack each one handles best. The two self-leveling sealants lead because horizontal, moving cracks in driveways, patios and garage floors are what most readers are trying to fix. After those come a textured gun-grade polyurethane for walls and steps, a highly elastic water-based caulk, a thin liquid for hairlines, a structural epoxy for cracks that have stopped moving, and a premixed patch for chips and shallow holes. If you are not sure which crack you have, read the diagnosis section above before you buy.

Sikaflex Self-Leveling Sealant
Self-Leveling Polyurethane, 10.1 or 29 oz
Sikaflex Self-Leveling is a single-component, premium-grade polyurethane joint sealant, and it is the product we would put in most horizontal concrete cracks. The case for it is movement. Sika rates it for expansion and contraction of up to 25 percent of the average joint width, which is what lets a bead survive a crack that opens in January and closes in July. Rigid fillers cannot do that, and it is the main reason they fail outdoors. It is also properly self-leveling. Poured into a clean crack, it flows to the edges and settles into a flat, smooth surface that sheds water and does not catch a snow shovel blade. In our test cracks it needed no tooling at all, and the finished surface sat level with the concrete once we learned to stop just short of the top and let it settle. Sika is also unusually specific about installation: a sealant depth between 1/4 and 1/2 inch in moving joints, the full 1/2 inch in horizontal joints that carry traffic, and a two-to-one width-to-depth ratio. Follow that with backer rod underneath and the bead lasts. The limitation is the flip side of the flow. It will not stay in a vertical crack, and on a steep driveway it creeps downhill before it skins, so lay short sections or use a non-sag product on the steepest stretch.
Pros
- Rated for movement of up to 25 percent of the joint width, so it flexes with seasonal slab movement
- Flows flat into horizontal cracks and control joints with no tooling
- Sika publishes clear depth and width-to-depth guidance, which takes the guesswork out of installation
- Sold in 10.1 oz tubes for spot repairs and 29 oz tubes for long joints
- Accelerated-cure formula skins over faster than older polyurethane joint sealants
Cons
- Runs out of vertical cracks and wanders on steeper driveway slopes
- The smooth gray bead is visible against weathered, textured concrete
The Bottom Line
The self-leveling polyurethane to buy for driveway, patio and garage-floor cracks that move with the seasons.

Quikrete Advanced Polymer Self-Leveling Sealant
Solvent-Free Self-Leveling Polymer, 10.1 or 29 oz
Quikrete's Advanced Polymer Self-Leveling Sealant does the same job as the Sikaflex above with a different chemistry, and in a couple of situations we would choose it first. It is solvent and isocyanate free, which matters when you are sealing a crack in a basement floor or an attached garage where fumes have nowhere to go. And it reaches a tack-free surface in about an hour according to Quikrete, which is noticeably quicker than traditional urethane sealants. On an outdoor slab that shortens the window in which leaves, grit, insects and curious pets can end up embedded in the bead. In our test cracks it poured easily from a standard caulk gun and leveled into a smooth, flat finish that sat flush with the concrete. Like every self-leveler, it is for horizontal surfaces only; tip the tube at a wall crack and it simply runs out. The other thing to plan for is volume. Quikrete rates a 10.1 ounce tube at about 12 linear feet in a joint half an inch wide and a quarter inch deep, which is honest and also a warning: an untreated crack an inch deep will swallow a tube in a few feet. Set the depth with backer rod first and the tubes go a long way. If you have a long control joint, the 29 ounce size and a larger caulk gun save a lot of reloading.
Pros
- Tack-free in about 60 minutes per Quikrete, so debris and footprints are less of a risk
- Solvent- and isocyanate-free formula, a real advantage in attached garages and basements
- Levels to a smooth, flat finish in horizontal cracks and expansion joints
- Quikrete publishes coverage: about 12 linear feet per 10.1 oz tube at a 1/2 by 1/4 inch joint
- Stocked widely in both tube sizes
Cons
- Horizontal use only; it will not hold in a wall crack
- Coverage disappears fast in deep cracks, so backer rod is close to mandatory
The Bottom Line
A strong alternative to Sikaflex, and our pick for indoor slabs where a fast tack-free time and low odor matter.
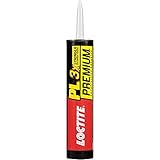
Loctite PL Concrete Crack & Masonry Sealant
Non-Sag Textured Polyurethane, 10 oz
Self-leveling sealants are the best answer on a flat slab and useless on a wall, and this is where the Loctite PL earns its place. It is a one-component, moisture-curing polyurethane in a gun-grade, non-sag consistency, which means it stays exactly where you put it in a vertical crack instead of slumping out and running down the face of the foundation. Loctite lists foundations, concrete walls, brick and block walls, expansion joints, driveways and sidewalks among its uses, and says it needs no primer on concrete or masonry. The feature we liked most is the texture. Most sealants cure to a smooth, slightly shiny bead that draws the eye to every repair. This one has a sandy, gritty finish that, once tooled, reads as part of the concrete or mortar joint rather than a strip of caulk. On a front step or a visible retaining wall, that makes a real difference to how the repair looks from the sidewalk. It also works well on the isolation joint between a driveway and the house wall, where you want flexibility and a product that will not sag. The trade-offs are modest. It takes a few minutes of tooling to get a clean line, and the texture makes that slower than smoothing a plain caulk. And like any gun-grade sealant, joints deeper than half an inch need backer rod.
Pros
- Non-sag gun grade holds its bead in foundation, step and retaining-wall cracks
- Textured finish blends into concrete and mortar far better than a glossy caulk line
- Loctite says no primer is needed on concrete, brick, stone or block
- Stays elastic to move with the joint rather than cracking out
- Also usable on horizontal cracks when a perfectly flat finish is not critical
Cons
- Needs tooling to look neat, and the texture makes smoothing slower
- Not recommended for joints deeper than 1/2 inch without backer rod, or for permanent water immersion
The Bottom Line
The polyurethane to reach for on walls, steps and the joint where a slab meets the house.

Sashco Slab Concrete Crack Repair
Water-Based Elastomeric Sealant, 10.5 oz
Sashco's Slab is built around one number: the company rates it to stretch up to 300 percent of its cured size without tearing or pulling away. That is a lot of headroom for a crack that opens noticeably in winter, and it is the reason we pick it for the liveliest cracks in the test set. It is water-based, which brings the usual advantages: soap-and-water cleanup, a low-odor formula with low VOC content, and no solvent smell hanging around a garage for a day. For a homeowner doing their first crack repair, being able to wipe mistakes off hands and tools with a wet rag makes the job considerably less stressful than working with a sticky urethane. Sashco is clear about how to install it. The bead should be at least a quarter inch thick so it has enough body to stretch, and no more than half an inch, and any crack deeper than half an inch and wider than a quarter inch needs backer rod first. Follow those rules and it performs as advertised. The trade-off is the chemistry. Water-based sealants cure by evaporation, so cold, damp weather slows them down considerably, and Sashco specifies storage between 40 and 90 degrees. Plan the job for a dry spell in spring or fall rather than a chilly November weekend, and keep traffic off it until it has fully cured.
Pros
- Sashco rates it to stretch up to 300 percent of its cured size
- Water cleanup and a low-VOC, low-odor formula
- Suited to sidewalk, patio, garage and driveway cracks plus horizontal expansion joints
- Clear instructions on bead thickness and when to use backer rod
- Friendlier for first-timers than solvent-based urethanes
Cons
- Water-based sealants cure slowly in cold, damp weather, and Sashco specifies storage between 40 and 90 degrees
- Needs a bead at least 1/4 inch thick to stretch properly, so it is not for hairlines
The Bottom Line
The most elastic option here, and a good choice for cracks that move a lot if you can work in mild weather.
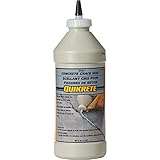
Quikrete Concrete Crack Seal
Acrylic Latex Liquid, Squeeze Tube or Bottle
Hairline cracks are the ones most people try to fill with the wrong product. A thick polyurethane cannot get into a crack a sixteenth of an inch wide; it bridges the surface, bonds to the dusty edges, and peels away within months. Quikrete Concrete Crack Seal is a ready-to-use acrylic latex liquid that is thin enough to actually run into those fine cracks. Squeezed straight from the bottle along the crack line, it flows in, self-levels and dries toward a concrete-gray color that is far less obvious than a caulk bead. Quikrete says it is dry to the touch in about 30 minutes and hardens in about 24 hours, and it is rated for cracks up to half an inch wide, though in our view the wider end of that range is better served by a polyurethane. It comes in a small squeeze tube for a few repairs and in quart and gallon bottles for a whole patio. Be realistic about what it is. Acrylic latex is not a high-movement sealant, so in a crack that visibly opens and closes with the seasons it will eventually crack out. It is at its best in stable shrinkage cracks on sidewalks, steps and patios, where the goal is to keep water from entering the slab and freezing. On deeper hairlines it can sink as it soaks in, so a second pass the next day is sometimes needed.
Pros
- Thin enough to run into hairlines that a caulk can only bridge
- Squeeze-bottle applicator puts the liquid right into the crack
- Self-levels and blends toward the color of natural concrete
- Quikrete rates it for cracks up to 1/2 inch wide
- Dry to the touch in about 30 minutes
Cons
- Acrylic latex has little movement capability, so it will reopen in a live crack
- Takes about 24 hours to harden, and deeper cracks may need a second pass as it settles
The Bottom Line
The right tool for fine, stable cracks where a thick sealant would just sit on top and peel.

PC Products PC-Concrete Two-Part Epoxy
100% Solids Epoxy Paste, 8.6 oz Cartridge
Epoxy is the opposite of every other product on this list, and that is precisely why it belongs here. PC-Concrete is a two-part, 100 percent solids structural epoxy paste that cures harder than the concrete around it. Squeezed from a standard caulk gun, the resin and hardener meet in the included static mixing nozzle in a one-to-one ratio, so there is no measuring or stirring. PC Products gives about 20 minutes of working time at 75 degrees and says the repair can be painted or bolted down in as little as four hours. Where it shines is a crack that is not going anywhere: an old shrinkage crack in a basement slab, a broken corner on a step, a cracked concrete post base, or a slab crack that you have watched for a year without it changing. Epoxy bonds the two sides together and restores strength across the crack, which no sealant can do. It is also solvent-free and odorless, which makes indoor use pleasant, and it doubles as an anchoring adhesive for bolts and railing posts. The warning is important. In a crack that still opens and closes, rigid epoxy transfers the stress to the concrete beside it, and a new crack simply forms next to the repair. If you are not sure whether a crack is moving, use polyurethane. Nozzles also clog quickly, so keep a spare.
Pros
- 100 percent solids, 1:1 structural epoxy that bonds cracked concrete back into one piece
- Dispenses and mixes through the included nozzle from a standard caulk gun
- About 20 minutes of working time at 75 degrees, with painting possible in as little as 4 hours
- Solvent-free and odorless, so it is comfortable to use indoors
- Doubles as an anchoring adhesive for bolts, rebar and railing posts
Cons
- Fully rigid, so it cracks out of, or beside, any crack that still moves
- Mixing nozzles clog between uses, and one cartridge covers a limited length of crack
The Bottom Line
The filler for cracks that have stopped moving and repairs where you want real strength, not flexibility.

Red Devil Pre-Mixed Concrete Patch
Acrylic Premixed Patch, 1 qt Tub
Not every concrete repair is a crack. Chipped step edges, small popouts, anchor holes and gouges in a basement wall need something with body that can be pressed in and smoothed flat, and a pourable sealant is useless for that. Red Devil's Pre-Mixed Concrete Patch is an acrylic-based, ready-to-use compound in a one-quart tub. Open it, press it into the damage with a putty knife, smooth it off, and clean your tools with water. There is no mixing, no pot life to race against, and the leftover keeps in the sealed tub for the next small job. Red Devil says it will not shrink or crack as it cures, stays slightly flexible, dries to a concrete color and can be painted. It handles interior and exterior repairs, and on our test step corner it built up without slumping and cured hard over about a day. Two limits keep it at the bottom of this list for most readers. Red Devil states it is not recommended for areas subject to vehicular traffic, so it does not belong on a driveway or garage floor where tires will roll over it. And it is a patch, not a sealant. Smear it into a crack that moves and it will reopen along the same line within a season. Use it for small, stable damage on walks, steps and walls, and use a polyurethane for anything that moves.
Pros
- Ready to use straight from the tub with a putty knife
- Acrylic formula with water cleanup and very low VOC content
- Dries to a concrete color and can be painted
- Fills holes, chips and broken edges that a sealant cannot hold
- Rated for both interior and exterior use
Cons
- Red Devil says it is not for areas with vehicle traffic, so keep it off driveways
- Not a crack sealant; in a moving crack it will reopen along the same line
The Bottom Line
A handy premix for small, shallow damage on walks, steps and walls, not a fix for driveway cracks.
4. Polyurethane vs Epoxy vs Patching Compound
Almost every concrete crack filler on the shelf falls into one of five families, and each behaves in a way the packaging rarely spells out.
| Type | Flexibility | Best Crack | Avoid On |
|---|---|---|---|
| Self-leveling polyurethane | High, around 25% joint movement | Horizontal moving cracks and joints | Walls and steep slopes |
| Gun-grade polyurethane | High | Walls, steps, foundations | Hairlines it cannot enter |
| Acrylic latex liquid | Low to moderate | Hairlines and stable cracks | Joints that open in winter |
| Two-part epoxy | None, fully rigid | Static cracks and broken edges | Any crack that still moves |
| Premixed or cement patch | Very low | Chips, popouts, shallow holes | Live cracks and joints |
Polyurethane is the default for outdoor slabs for a simple reason: concrete moves. Slabs expand in summer heat, shrink in winter cold and shift with the soil beneath them, and a urethane bead stretches with that movement instead of tearing. The self-leveling versions pour flat and give a clean, level surface on driveways, while the gun-grade versions stay where you put them on a wall.
Epoxy is the opposite. A two-part epoxy cures harder than the concrete around it and bonds the two sides of a crack into one piece. That is exactly what you want in a crack that has stopped moving, such as an old shrinkage crack in a basement slab or a broken step nose. In a live crack, the concrete next to the epoxy becomes the weak point, and a new crack opens right beside the repair.
Epoxy injection, where resin is pumped into a crack through surface ports, is a structural repair for poured foundation walls and a different job from filling a slab crack. Homeowner injection kits exist, and for leaking basement walls many use polyurethane foam rather than epoxy. Our basement crack repair guide covers when each approach is worth using.
Patching compounds, whether acrylic premixes or vinyl-modified cement, are for filling volume: chipped edges, popouts and shallow holes. They are not crack sealants, and a patch smeared into a moving crack will reopen along the same line. For broad surface damage across a whole slab, a concrete resurfacer is the better tool.
5. Backer Rod and Joint Depth: The Step Everyone Skips
If you remember one technical point from this guide, make it this: a sealant bead has an ideal shape, and more is not better. Flexible sealants are designed to stretch in a joint that is roughly twice as wide as it is deep. A bead that is too deep cannot stretch evenly, and the stress concentrates at the bond line until one side tears loose.
Backer rod is a round, compressible foam cord that you press into the crack before sealing. It does three jobs. It sets the depth of the sealant so the bead has the right proportions. It stops the sealant from bonding to the bottom of the crack, so the bead only grips the two sides and can flex freely between them. And it saves product, sometimes a startling amount, because a deep crack can swallow a whole tube before you see any fill.
THE RULE
Width twice the depth, and never deeper than 1/2 inch.
If the crack is deeper than about half an inch, press in backer rod or packed sand first. The sealant should finish between 1/4 and 1/2 inch deep, bonded to the two sides only.
The manufacturers are specific about this. Sika's self-leveling data calls for a sealant depth between 1/4 and 1/2 inch in moving joints, the full 1/2 inch in horizontal joints that take traffic, and a two-to-one width-to-depth ratio. Sashco tells you to use backer rod in any crack deeper than 1/2 inch and wider than 1/4 inch. Loctite does not recommend its polyurethane in joints deeper than 1/2 inch without backer rod.
Buy closed-cell rod for outdoor work, sized about a quarter wider than the crack so it stays put under compression. Push it in with a blunt tool such as a putty knife or a wooden paint stirrer, never a screwdriver tip. A punctured closed-cell rod can release gas and leave bubbles in the sealant above it.
For narrow, deep cracks where rod will not fit, pack the bottom with clean, dry sand and seal over it. That is a workable substitute on horizontal slabs, and it is the same technique we describe for wide cracks in our asphalt crack filler guide, where the principle is identical even though the product chemistry is not.
6. Horizontal vs Vertical Cracks
The orientation of the crack decides the consistency of the product, and this is where the self-leveling versus gun-grade split matters most.
On a horizontal surface, self-leveling sealant is the better choice by a wide margin. It flows into the crack, finds its own level and cures with a flat, smooth top that sheds water and does not catch a snow shovel. You get a neater result without tooling, and a flat bead is less likely to be torn out by tires or foot traffic. On a sloped driveway, though, a thin self-leveler will run downhill. Lay down short sections and let them skin over, or switch to a non-sag product for the steepest stretch.
On a vertical surface, a self-leveling product simply runs out of the crack and down the wall. You need a non-sag, gun-grade sealant that holds its bead where you put it. Foundation walls, retaining walls, step risers and the gap where a slab meets a house wall all fall into this group. A textured product that tools to a sandy finish is also far less visible on a wall than a glossy caulk line.
The junction between a driveway or patio and the house foundation deserves special attention. It is usually an isolation joint designed to let the slab move independently of the house, and it is one of the most common places water finds its way into a basement. Seal it with a flexible polyurethane over backer rod, never with mortar or epoxy, which lock the slab to the house and crack at the first hard freeze.
Cracks on the underside of a structural slab, such as a garage ceiling or a concrete porch roof, are a job for a non-sag product at most, and often for a professional. If a crack in a slab above your head is getting wider, it is not a filler question at all.
7. How to Prep and Fill a Concrete Crack
Most crack repairs fail at the bond, not in the product, and the bond is decided by preparation.
Start by opening the crack up. Use a wire brush, a cold chisel or an angle grinder with a crack-chasing blade to remove loose concrete and give the crack clean, sound sides. A slightly widened crack with square walls takes sealant far better than a ragged hairline full of grit. Then blow it out with compressed air or a shop vacuum. A crack that looks clean usually still has a layer of dust on its walls, and sealant bonds to the dust instead of the concrete.
Moisture matters more than most labels admit. Polyurethane sealants cure with moisture from the air, but they still need a dry crack to bond; a damp crack produces bubbles and weak adhesion. Wait at least a day after rain or pressure washing, and fill on a dry day with the slab comfortably above 40 degrees. Avoid filling in blazing midday sun, when the crack is at its narrowest and the fresh sealant will be stretched hard as the slab cools overnight.
Install backer rod if the crack needs it, cut the nozzle to match the crack width, and fill in one steady pass. For self-leveling products, stop slightly below the surface and let the product settle; overfilling leaves a raised strip that tires scuff away. For gun-grade products, tool the bead with a gloved finger or a plastic spoon within a few minutes, before it skins over.
Keep traffic off the repair until it has cured, which means a day or more for most sealants and longer in cool weather. A good caulk gun with a smooth, high thrust ratio makes the 29 ounce tubes far easier to control along a long joint.
8. When a Crack Is Not a Filler Problem
Crack fillers seal. They do not hold concrete together, stop settlement or reverse frost heave, and some cracks are telling you something a tube of sealant cannot fix.
Be wary of cracks wider than about a quarter inch that are still growing, cracks where one side has dropped or lifted noticeably, and stair-step cracks running through block walls. In a foundation, a horizontal crack along a basement wall can signal soil pressure pushing the wall inward and deserves an inspection by a structural engineer rather than a bead of caulk. Vertical and diagonal hairline cracks in poured walls are far more common and usually benign.
On a driveway, a web of interconnected cracks with sunken sections usually means the base under the slab has washed out or was never compacted properly. Filling each crack will keep water out for a while, and that is worth doing to slow the damage, but the slab will keep breaking up. At that stage the conversation is about replacement or slab lifting rather than which filler to buy.
The pattern of cracking can also point to drainage. Cracks that cluster where a downspout discharges, or along an edge where water pools after rain, are often a sign that the soil underneath is being saturated and softened. Redirecting that water will do more to stop new cracks than any filler on this list.
None of this means filling is pointless on a failing slab. Keeping water out of the cracks slows freeze-thaw damage and buys time. Just budget for it as maintenance rather than a cure, and do not spend premium money sealing a slab you plan to replace within a couple of years.
9. After Filling: Sealing and Resurfacing
Filling the cracks is usually the first step of a larger job, and the order you do things in matters.
If you plan to seal the whole slab, fill the cracks first and let the filler cure fully before sealing over it. Most sealers can go over cured polyurethane, but check the sealant's data sheet, since some need a longer cure before they will accept a coating. Our best concrete sealer guide covers penetrating and film-forming sealers for patios and walks, and for driveways specifically see our concrete driveway sealer reviews. A penetrating silane or siloxane sealer is also the best defense against hairlines too fine to fill.
If the surface is scaled, pitted or covered in many small cracks, a resurfacer may be a better investment than dozens of individual repairs. Fill the larger cracks and every control joint with flexible sealant, then resurface the rest of the slab. Remember that a resurfacer is rigid, so any live crack underneath will reflect straight through it; the joints have to be preserved, not buried. Our guide to the best concrete resurfacer walks through that process.
Expect to revisit filled cracks every few years. Polyurethane sealants in traffic areas last well when installed at the right depth, but UV, tire scuffing and extreme movement all wear them down. A repair that has pulled away on one side can usually be cut out and re-sealed without starting from scratch.
If your driveway is asphalt rather than concrete, none of these products are the right choice. Asphalt needs a flexible rubberized or bitumen-based filler, which we compare in our driveway crack filler roundup.
10. Common Mistakes to Avoid
Using epoxy in a moving crack
Epoxy cures harder than the concrete around it, so when a live crack opens in winter, the concrete beside the repair breaks instead of the epoxy. You end up with the original crack plus a new one next to it. Save rigid epoxy for cracks that have demonstrably stopped moving, and use flexible polyurethane everywhere else.
Filling a deep crack without backer rod
A bead that is too deep cannot stretch evenly and tears at the bond line. It also wastes product, sometimes a whole tube every few feet. Any crack deeper than about half an inch needs backer rod or packed sand first, so the sealant finishes at the depth the manufacturer actually designed it for.
Sealing over dust and damp
Sealant bonds to whatever is on the crack walls. If that is loose grit or a film of dust, the bead peels out with it within months, and a damp crack leaves bubbles and weak adhesion. Wire brush, vacuum or blow the crack clean, and wait for a dry day after rain or washing before filling.
Using self-leveling sealant on a wall
Self-leveling products are thin by design and will run straight out of a vertical crack and down the face of a foundation or step riser. On walls and steep slopes you need a non-sag, gun-grade polyurethane that holds its bead. Check the label for horizontal-only wording before you buy anything for a wall.
Burying control joints under patch
Control joints exist so the slab cracks where it is supposed to. Fill them with rigid patching compound or skim them over with resurfacer and the slab simply cracks somewhere else, usually right beside the joint. Keep every joint open and seal it with flexible polyurethane over backer rod instead.
11. Frequently Asked Questions
What is the best concrete crack filler for a driveway?
For most driveway cracks between 1/8 and 1/2 inch, a self-leveling polyurethane such as Sikaflex Self-Leveling Sealant or Quikrete Advanced Polymer Self-Leveling Sealant is the right choice. It flexes with seasonal movement, levels flat so tires and shovels do not catch it, and holds up to traffic when installed at the proper depth over backer rod. Hairlines need a thinner liquid filler.
Can I use regular caulk to fill cracks in concrete?
Only if it is rated for concrete. Standard household acrylic or silicone caulk is not designed for the movement, abrasion and UV exposure of an outdoor slab, and most will fail within a season. Look for a polyurethane or hybrid polymer labeled for concrete, and check whether it is self-leveling for horizontal cracks or non-sag for vertical ones.
How wide a crack can concrete crack filler fix?
Most caulk-tube sealants handle cracks from about 1/8 inch up to 1/2 inch comfortably, and self-leveling joint sealants can fill joints over an inch wide when set on backer rod. Past about an inch and a half you are no longer sealing a crack; the edges usually need patching with a cement-based repair product, or the section needs replacing.
Should I fill hairline cracks in concrete?
Not always. Many hairline shrinkage cracks are cosmetic and stable. Where water can get in and freeze, a thin liquid filler that wicks into the crack helps, and a penetrating sealer over the whole slab protects against water entering through hairlines too fine to fill. Thick caulk over a hairline just bridges the surface and peels off within months.
How long does concrete crack filler last?
A properly installed polyurethane sealant in a clean, dry crack at the correct depth typically lasts several years, and longer out of direct traffic and sun. Acrylic liquids and patching compounds wear out sooner, especially in freeze-thaw climates. Inspect filled cracks each fall and re-seal any section that has pulled away from one side before winter sets in.
Is epoxy or polyurethane better for concrete cracks?
It depends on whether the crack moves. Polyurethane stays flexible and is right for outdoor slab cracks and joints that open and close with temperature. Epoxy is rigid and structural, so it suits cracks that have stopped moving and repairs where you want the two sides bonded together, such as a broken step edge or a stable basement slab crack.
Can I seal or paint over concrete crack filler?
Usually, once it has cured. Most polyurethane and acrylic crack fillers accept a concrete sealer or paint after the cure time on the label, often a few days. Check the data sheet, since some sealants need longer before coating. Always fill cracks before sealing the slab, never after, so the sealer does not interfere with the filler's bond.
Related Concrete Crack Guides
Buyer's Guide
Best Concrete Resurfacer
When the surface is too far gone for spot repairs, these resurfacers renew a scaled or pitted slab.
How-To
Driveway Crack Repair
Step-by-step methods for concrete and asphalt driveway cracks, and when to call a pro.
Buyer's Guide
Best Concrete Sealer
Protect filled cracks and the rest of the slab from water, salt and freeze-thaw damage.
The Bottom Line
The best concrete crack filler is the one matched to the crack. For most horizontal cracks in driveways, patios and garage floors, that is a self-leveling polyurethane like Sikaflex Self-Leveling Sealant, installed over backer rod at the right depth. For walls and steps, use a non-sag polyurethane like Loctite PL; for hairlines, a thin liquid like Quikrete Concrete Crack Seal; and save epoxy for cracks that have genuinely stopped moving.
Whatever you buy, the repair lives or dies on prep. Clean the crack back to sound concrete, fill it dry, respect the depth limit on the label, and check it again each fall. Do that and an ordinary tube of sealant will do more for your slab than any miracle product on the shelf.
More in Driveway & Concrete
Guides in this category that pair with what you just read.
About the Author
Alex Rivers, Home Improvement Editor
Alex has spent over a decade working on residential and light commercial property maintenance, and now tests every tool, coating and machine that appears in these guides personally.