Best Concrete Resurfacer
A resurfacer can make a tired slab look new for a fraction of the cost of replacement, but only on sound concrete with honest prep. Here is which products earn it, and when to skip resurfacing altogether.
Alex Rivers
Home Improvement Editor
Last Updated
September 29, 2026
In This Guide
Concrete resurfacer is a thin coat of polymer-modified cement that bonds to an old slab and gives it a new wearing surface. It does not fix cracks, heaving or a failed base, and it will not stick to dirty, sealed or crumbling concrete. Put it on a sound, scrubbed slab at the right thickness and it can add years of good looks for a weekend of work. Put it anywhere else and it peels in the first winter.
Our Picks at a Glance
- Best Overall: Quikrete Re-Cap Concrete Resurfacer — Polymer-Modified Resurfacer, 40 lb Bag
- Runner-Up: Sakrete Flo-Coat Concrete Resurfacer — Polymer-Modified Resurfacer, 50 lb Pail
- Fastest Return to Service: Rapid Set NewCrete Concrete Resurfacer — Rapid-Setting Cement Resurfacer
- Best for Pits and Spalls: Quikrete Vinyl Concrete Patcher — Vinyl-Modified Patcher, 20 lb Pail
- Best for Chipped Edges: Sakrete Top 'N Bond Patching Material — Self-Bonding Patching Cement
- Best for Deep Repairs: Rapid Set Cement All — Rapid-Setting Repair Mortar and Grout
- Best for Interior Floors: Henry 549 FeatherFinish Patch & Skimcoat — Interior Cement Patch and Skim Coat, 7 lb
1. How We Picked and Tested
We looked at the resurfacing and thin-patching products homeowners can actually buy: bagged and pailed materials from Quikrete, Sakrete, CTS Rapid Set and Henry that are stocked at big-box stores and sold on Amazon. We left out professional overlay systems that need a trained crew, a spray rig or proprietary primers, because they are not what someone resurfacing a driveway on a Saturday is choosing between.
Every product was judged against its published data: application thickness range, working time, time to foot and vehicle traffic, and whether it is rated for exterior use. Those four numbers decide which product fits a job far more than brand does. A product that sets in 15 minutes is a gift on a small step repair and a disaster on a two-car driveway.
We applied the main resurfacers to sections of a weathered patio slab with light scaling and pitting after pressure washing it, and used the patching products on chipped step edges and popouts. We paid attention to how forgiving each one was to mix, how long it stayed workable in warm weather, how well it took a broom finish, and whether it showed crazing or hollow-sounding spots after curing.
We weighted forgiveness heavily. Resurfacing is a one-shot job: once the material starts to set, you cannot rework it, and a product with a sensible working window is worth more to a first-timer than one that is marginally stronger. We also favored manufacturers that publish clear instructions on preparation, since most resurfacing failures trace back to the surface underneath rather than the bag.
Prices vary by region and package size, so we describe cost in broad tiers rather than quoting figures that will be out of date within months.
2. Can Your Slab Be Resurfaced?
Resurfacing is a surface repair, and the most important decision is whether your problem is actually on the surface.
Good candidates are slabs with scaling, where the top layer has flaked off in patches after years of freeze-thaw and deicing salt; light spalling and popouts; surface pitting; worn, exposed aggregate; and staining you want to cover. If the concrete underneath is hard and sound, and the slab is level and not rocking, a resurfacer bonds well and can transform its appearance. Our guide to preventing concrete spalling in winter explains why this damage happens and how to stop it coming back.
Poor candidates are slabs with structural problems. Sunken or heaved sections, cracks where one side sits higher than the other, wide cracks that are still growing, and concrete that crumbles when you scrape it with a screwdriver all point to a failure below the surface. A resurfacer is typically about an eighth of an inch of cement. It cannot bridge a moving crack or support a slab over a void, and the new surface will crack along the old lines within a season or two.
Try a simple sounding test before you buy. Drag a length of chain or tap a steel bar across the slab and listen. Solid concrete rings; delaminated areas sound hollow and dull. Hollow spots must be chipped out and patched before resurfacing, or the new layer will pop off with the loose concrete beneath it.
If more than about a third of the slab is hollow, heaved or badly cracked, resurfacing is money spent on a surface that is about to fail anyway. Compare the numbers in our driveway resurfacing cost guide against a replacement quote before committing.
3. Our 7 Top Picks
The seven products below cover the whole resurfacing job, not just the top coat. Three are true resurfacers for renewing an entire slab: Quikrete Re-Cap, Sakrete Flo-Coat and Rapid Set NewCrete. Two are thin patching materials for filling pits, spalls and chipped edges before, or instead of, resurfacing. The last two are specialists: a structural rapid-set repair material for broken steps and deep damage, and an interior-only skim coat for basement and garage floors that will go under a floor covering. Match the product to the thickness and the location of the damage.
Quikrete Re-Cap Concrete Resurfacer
Polymer-Modified Resurfacer, 40 lb Bag
Quikrete Re-Cap is the resurfacer most people will end up buying, and for once the most common choice is also the right one. It is a polymer-modified blend of portland cement and fine sand designed to bond to old concrete without a separate bonding agent, provided the slab is properly cleaned and dampened. Its range is its biggest strength. Quikrete rates it from a feather edge of 1/16 inch up to 1/2 inch, so the same bag can skim a lightly worn walkway or build up over a moderately scaled driveway. At the ideal 1/8 inch, a 40 pound bag covers roughly 40 square feet, which makes estimating straightforward. On our test slab it mixed to a smooth, pourable consistency with a paddle mixer, spread easily with a long-handled squeegee, and took a crisp broom finish while it was still plastic. Quikrete lists walking on it after about eight hours and driving on it after about 24, which in practice means a Saturday job is usable by Sunday evening. What Re-Cap will not forgive is poor preparation. It needs sound concrete, a thorough pressure wash to remove dirt and weak surface paste, and a slab that is saturated but free of standing water when you spread it. It also needs a steady pace: in summer heat the working window closes quickly, so mix partial batches and bring a helper for anything larger than a patio.
Pros
- Spreads from a 1/16 inch feather edge up to 1/2 inch, so one product handles skim coats and moderate wear
- About 40 square feet per 40 lb bag at 1/8 inch, per Quikrete
- Walkable in about 8 hours and drivable in about 24 in normal conditions
- Can be squeegeed, troweled or broom-finished for a slip-resistant surface
- Widely stocked, so running short mid-job is easy to fix
Cons
- Demands thorough pressure washing and a damp, saturated slab to bond properly
- Working time shrinks fast in hot weather, so large slabs need a helper
The Bottom Line
The resurfacer we would buy for most driveways, patios and walks: forgiving, well documented and ready for cars in about a day.

Sakrete Flo-Coat Concrete Resurfacer
Polymer-Modified Resurfacer, 50 lb Pail
Sakrete Flo-Coat is the closest direct competitor to Quikrete Re-Cap, and most slabs that suit one will suit the other. It is a polymer-modified cement resurfacer intended to renew worn, pitted and lightly scaled concrete on driveways, patios, walks and steps, and it is designed for thin application down to a feather edge. The practical difference most people notice is the packaging. Flo-Coat is sold in a 50 pound plastic pail rather than a paper bag, which keeps the unused powder dry between sessions and gives you a sturdy container to mix in. For a smaller job spread over a couple of weekends, that is genuinely useful. Sakrete lists about 20 minutes of working time, which is enough for a methodical section-by-section approach, and a full cure in about 12 hours, with light traffic after a day and full traffic after two. At a quarter inch thick, a pail covers roughly 23 square feet; at a thin skim coat it goes much further. That math is the main drawback. On a large driveway that needs a heavier build, you will go through a lot of pails. On our test section it spread smoothly, took a broom texture well and cured to an even gray. Like any resurfacer, it depends entirely on sound, clean, dampened concrete beneath it and on preserving the control joints through the new surface.
Pros
- Pail packaging keeps the powder dry between sessions and doubles as a mixing bucket
- About 20 minutes of working time per Sakrete
- Covers roughly 23 square feet per 50 lb pail at 1/4 inch, and far more as a thin skim coat
- Light traffic after about a day and full traffic after about two
- Moisture-resistant finish suited to exterior slabs
Cons
- Thicker builds use pails quickly, so a full driveway gets expensive
- Less common on store shelves than Re-Cap in some regions
The Bottom Line
A like-for-like alternative to Re-Cap, especially handy for smaller patios, steps and walks where the pail makes storage easy.
Rapid Set NewCrete Concrete Resurfacer
Rapid-Setting Cement Resurfacer
NewCrete is built on the calcium sulfoaluminate cement technology that CTS uses across its Rapid Set line, and its selling point is speed. CTS says it takes foot traffic in about two to three hours, compared with most of a day for conventional resurfacers. For a front walk, a shop entrance or the only path to your back door, that turnaround is the whole reason to buy it. What surprised us is that the speed does not come with a frantic working window. CTS lists about 30 minutes of working time, which is more than some standard resurfacers offer, and on our test section it stayed workable long enough to spread, smooth and broom a sensible area before stiffening. Its typical thickness is from a skim coat to about 1/8 inch, with CTS allowing up to half an inch in smaller areas, and it can be used to prefill small cracks, spalls and holes up to half an inch before the main coat goes on. For deeper damage, CTS points you toward its other repair products. The drawbacks are cost and availability. NewCrete sits in the premium tier and is not stocked everywhere, so buy enough for the whole job before you start. And like any fast-setting cement, it punishes hesitation in hot weather: mix only what you can place, keep the slab properly dampened, and have tools laid out before water touches the powder.
Pros
- Takes foot traffic in about 2 to 3 hours, per CTS
- About 30 minutes of working time, generous for a rapid-setting product
- Spreads from a skim coat to 1/8 inch, and up to 1/2 inch in small areas
- Can prefill small cracks, spalls and holes up to 1/2 inch before resurfacing
- Made by CTS, whose Rapid Set cements are a staple on professional jobsites
Cons
- Premium price tier and harder to find than the big-box brands
- Less forgiving of slow work than standard resurfacers, especially in heat
The Bottom Line
The pick when you cannot afford to lose a walkway, entry or business frontage for a full day.
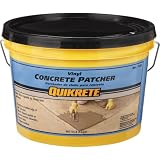
Quikrete Vinyl Concrete Patcher
Vinyl-Modified Patcher, 20 lb Pail
Resurfacers are designed to go on at a consistent thin layer, which means any pit or spalled patch deeper than that layer shows through as a dip. Quikrete Vinyl Concrete Patcher is the tool for filling those spots first. It is a blend of exterior-grade vinyl resin, fine sand and portland cement made for thin repairs to spalled, cracked or pitted horizontal concrete, and it trowels down to a feather edge of about 1/16 inch. That feather edge is what lets a repair blend into the surrounding slab without a visible lip. The vinyl resin also makes it noticeably sticky, which helps it grip the ragged edges of a popout or the worn nose of a step. On vertical faces, Quikrete says to build deep repairs in quarter-inch layers, and that is sensible advice; trying to fill a deep chip in one go invites sagging. A 20 pound pail covers about 17 square feet at an eighth of an inch, which is plenty for prefilling the worst damage on a driveway before the resurfacer goes on. Two limits are worth knowing. Quikrete specifically says not to use it in cracks narrower than an eighth of an inch or in expansion joints, both of which belong to a flexible sealant. And it is not a resurfacer in its own right; spreading it over a whole slab is slow and leaves an uneven, trowel-marked finish.
Pros
- Trowels to a 1/16 inch feather edge for shallow pits and spalls
- Vinyl resin grips old concrete on floors, walks, driveways and steps
- A 20 lb pail covers about 17 square feet at 1/8 inch, ideal for prefilling before resurfacing
- Can be built up on vertical faces in 1/4 inch layers
- Budget-friendly and widely available
Cons
- Quikrete says not to use it in cracks narrower than 1/8 inch or in expansion joints
- Too stiff and slow to spread evenly over a whole slab
The Bottom Line
The prep product that makes a resurfacing job look professional: fill the pits first, then resurface over them.
Sakrete Top 'N Bond Patching Material
Self-Bonding Patching Cement
Top 'N Bond does a similar job to the Quikrete patcher above, and we include both because each is easier to find in different stores and regions. Where Top 'N Bond stands out is shaping. It is a self-bonding patching cement designed to go from a feather edge up to half an inch thick in a single layer, and its consistency holds well on the broken nose of a step, a chipped curb or the corner of a slab where a patch has to keep its profile rather than flow flat. For repairs deeper than half an inch, Sakrete's instructions are clear and worth following: level the first layer, roughen it with a coarse broom, let it harden for about a day, then add the next. It is slower than a single deep pour, but it avoids the sagging and shrinkage cracks that come from trying to build a thick patch in one go. For deep structural damage, a rapid-set repair mortar is quicker. Sakrete also allows it as a thin brush coat up to an eighth of an inch, which is useful for dressing a small area around a repair. The main cosmetic issue is shared with every patch: fresh cement rarely matches old, weathered concrete. If the patch is in a prominent spot, plan to resurface the whole panel afterward so the color is uniform, or at least apply a penetrating sealer across the slab to even out the appearance over time.
Pros
- Self-bonding formula needs no separate bonding agent on clean, sound concrete
- Works from a feather edge to 1/2 inch per layer
- Builds thicker in 1/2 inch lifts, roughened and cured between coats
- Sticky enough to hold on step noses, curbs and vertical faces
- Can also be applied as a thin brush coat up to 1/8 inch
Cons
- Deep repairs take days because each lift needs time to harden
- Fresh patches rarely match old concrete until the slab is resurfaced or sealed
The Bottom Line
A dependable patcher for rebuilding chipped steps and edges, where holding shape matters more than spreading fast.
Rapid Set Cement All
Rapid-Setting Repair Mortar and Grout
Cement All is here because every resurfacing project eventually meets a repair that is too deep for a resurfacer, and this is the material we trust for it. It is a high-performance, fast-setting repair mortar and non-shrink grout from CTS. CTS says it sets in about 15 minutes, reaches structural strength in about an hour, and builds to around 9,000 psi of compressive strength at 28 days, far stronger than a typical residential slab. That strength and speed make it ideal for rebuilding a broken step nose against a simple wooden form, filling a deep spalled hole before resurfacing over it, setting a mailbox post or railing anchor, or grouting a baseplate. It is non-metallic with no added chlorides, and suitable indoors and out. In our testing, a formed step edge could be stripped and walked on within the hour, which transforms a job that would otherwise tie up an entry for days. The catch is exactly the same speed. Fifteen minutes to set leaves only a few minutes of real working time once mixed, especially on a warm day, so it has to be mixed in small batches and placed immediately. That makes it unsuitable as a resurfacer; trying to spread it across a slab produces lumps, lap marks and wasted material. Use it for the deep repairs, let them cure, and resurface over the top with a product designed for thin coats.
Pros
- Sets in about 15 minutes and reaches structural strength in about an hour
- Rated to about 9,000 psi compressive strength at 28 days
- Handles deep patches, formed step edges, anchoring and grouting
- Non-metallic with no added chlorides, for interior and exterior use
- One bag covers many jobs around the house beyond concrete repair
Cons
- Sets far too fast to spread across a slab as a resurfacer
- Must be mixed in small batches and placed immediately
The Bottom Line
Not a resurfacer, but the product to reach for when damage is too deep for one, from broken steps to failed post bases.
Henry 549 FeatherFinish Patch & Skimcoat
Interior Cement Patch and Skim Coat, 7 lb
Henry's FeatherFinish shows up in almost every search for concrete resurfacer, so it is worth being clear about what it is. It is a portland cement-based patch and skim coat for interior floors, designed to create a smooth, flat surface before floor coverings go down. For that job it is excellent. Mixed two parts powder to one part water, it trowels to a glassy-smooth finish, and Henry says it dries in as little as 15 minutes, which lets you patch in the morning and lay vinyl plank or tile the same day. It fills from a feather edge up to five inches deep, bonds to concrete, wood, ceramic tile and metal without a primer, and covers around 198 square feet per seven pound box as a skim coat. On our test basement slab it filled old anchor holes, a hairline grid and a shallow dip with no fuss. Henry lists it as interior only, and that is the line that matters here. It is not formulated for rain, freeze-thaw cycles, deicing salt or tire traffic, and it is not meant to be the finished wearing surface; it needs a floor covering on top. Put it on a driveway or patio and it will not last a winter. If you are refinishing a basement or finishing a garage conversion, buy it. If you are fixing an outdoor slab, buy one of the exterior resurfacers above.
Pros
- Dries in as little as 15 minutes for fast flooring installs
- Fills from a feather edge up to 5 inches deep, per Henry
- Bonds to concrete, wood, tile and metal subfloors without primers
- About 198 square feet per 7 lb box as a skim coat
- Trowels exceptionally smooth, ideal under vinyl plank, tile and carpet
Cons
- Interior only; it is not made for exterior slabs
- Not a wearing surface, so it must be covered with flooring
The Bottom Line
The right product for flattening a basement or garage-conversion floor before new flooring, and the wrong one for anything outdoors.
4. Resurfacer vs Patcher vs Rapid-Set Repair Mortar
The products in this category sit side by side on the shelf but do very different jobs, and buying the wrong one is the most common way to waste a weekend.
| Product Type | Typical Thickness | Use It For | Examples |
|---|---|---|---|
| Polymer-modified resurfacer | Feather edge to about 1/2 inch | Renewing a whole slab surface | Quikrete Re-Cap, Sakrete Flo-Coat |
| Rapid-setting resurfacer | Skim coat to 1/8 inch, more in small areas | Fast return to service | Rapid Set NewCrete |
| Vinyl or polymer patcher | Feather edge to about 1/2 inch per layer | Pits, spalls and chipped edges | Quikrete Vinyl Patcher, Sakrete Top 'N Bond |
| Rapid-set repair mortar | Deep and formed repairs | Broken steps, structural patches | Rapid Set Cement All |
| Interior skim coat | Feather edge to several inches | Indoor floors under coverings | Henry 549 FeatherFinish |
A resurfacer is designed to be spread thin over a large area. It combines fine sand, portland cement and polymer modifiers that let it bond to old concrete without a separate bonding agent and cure without cracking at an eighth of an inch. It is not designed to fill deep holes; built up too thick in one pass, it can shrink, crack and lose its bond.
A patcher is designed for small areas at varying depth. Vinyl and polymer-modified patchers are sticky enough to hold on a chipped step edge and can be troweled to a feather edge, which makes them the right tool for prefilling pits before a resurfacer goes on. They trowel too stiffly to cover a whole slab evenly.
Rapid-set repair mortars such as Cement All are much closer to high-strength concrete. They set in minutes, reach high compressive strength and can be formed and built up thick, which is why they suit rebuilding a broken step nose or setting a post. That speed makes them impractical to spread over large areas.
Interior skim coats and underlayments, like Henry FeatherFinish, are a separate category. They are excellent at flattening a basement or garage floor before tile or vinyl plank goes down, and they are not made for exterior slabs that see rain, freeze-thaw and deicing salt.
5. Surface Prep Decides Whether It Lasts
Resurfacer bonds to the top of the old concrete. If the top of the old concrete is dirt, sealer, oil or loose cement paste, the resurfacer bonds to that instead, and comes off with it. Nearly every peeling resurfacer we have seen failed at the prep stage, not because of the product.
Start by removing anything that is not sound concrete. Chip out loose and hollow-sounding areas with a hammer and cold chisel. Degrease oil stains, and remove any existing sealer, paint or coating; a slab that beads water almost certainly carries a sealer, and most resurfacers will not bond to it. Grinding or chemical stripping is the only real fix. Our guide to sealing old concrete explains how to tell whether a weathered slab still carries a coating.
Then clean aggressively. A garden hose and a push broom will not remove the chalky surface paste and embedded grime that stop resurfacer bonding. Use a pressure washer, ideally a gas unit around 3,000 psi with a surface cleaner or a 15 degree tip, and work methodically across the slab. Our walkthrough on pressure washing a driveway covers nozzle choice and distance so you clean the surface without gouging it.
Patch before you resurface. Fill pits, popouts and spalled areas deeper than the resurfacer's thickness range with a patcher or repair mortar and let them cure first. Treat cracks separately, as covered below. Then, immediately before application, dampen the slab so it is saturated but has no standing water. A dry slab pulls water out of the resurfacer and weakens the bond; puddles thin the mix. Sweep or blow out any water sitting in low spots.
Budget more time for prep than for application. On a typical two-car driveway, cleaning, chipping and patching can easily take a full day before the first bag is opened.
6. Mixing and Applying Without Lap Marks
Resurfacer is applied thin and fast, and the working window is the constraint that shapes the whole job.
Work in sections. Divide the slab along its existing control joints and treat each panel as a separate pour. Mix only as much as you can spread in the working time, which for most resurfacers is roughly 20 to 30 minutes in mild weather and less in heat. A paddle mixer on a heavy half-inch drill gives a consistent, lump-free mix; hand-mixing a 40 pound bag rarely does, and the lumps show in the finish.
Pour the mix onto the damp slab and spread it with a long-handled squeegee, pushing it into pores and pits. At an eighth of an inch or less, one pass usually covers well. For a thicker build, a second coat can follow once the first has set enough to walk on, following the manufacturer's timing. Keep a wet edge and do not keep working areas that have started to stiffen; overworking draws water to the surface and weakens the top layer.
RE-CAP BY THE NUMBERS
1/16-1/2 in
Rated thickness range
~40 sq ft
Per 40 lb bag at 1/8 inch
8 hrs
Until foot traffic
24 hrs
Until vehicle traffic
Finish while the surface is still plastic. A broom drawn across the slab in one direction gives a slip-resistant texture that also hides small variations in thickness. On walkways and driveways, a broom finish is safer when wet than a smooth trowel finish, and it is much more forgiving of amateur technique.
Bring a helper. One person mixing while another spreads is the difference between a seamless surface and one with visible lap lines where a batch started to set before the next one arrived.
7. Cracks and Control Joints
A resurfacer is a rigid layer of cement, which means it faithfully reproduces any movement underneath it. That makes cracks and joints the most important detail of the entire job.
Every control joint in the original slab must survive into the new surface. Those joints exist so the slab cracks where it is supposed to. Bury them and the slab cracks anyway, usually in a jagged line right through your new surface. The usual approaches are to press weatherstripping or a thin strip into each joint before resurfacing and pull it out once the material has set, or to re-cut the joint with a grooving tool or saw afterward.
Existing cracks need different treatment depending on whether they move. Stable hairline cracks can be filled with a patcher and resurfaced over, though they may still show as a faint line. Moving cracks cannot be resurfaced over at all; they will reappear within a season. The right approach is to treat them like joints: seal them with a flexible polyurethane and keep them open through the new surface.
Our guide to the best concrete crack filler covers which sealants suit each crack type and how to set the depth with backer rod. Do the crack work before you resurface, then re-seal those lines after the resurfacer cures so the new surface and the sealant finish flush.
If the slab has so many cracks that preserving them all would leave a patchwork, that is usually a sign of structural problems below the surface, and resurfacing is the wrong investment.
8. Temperature, Weather and Curing
Cement-based products cure through a chemical reaction with water, and that reaction is sensitive to temperature.
Most cement resurfacers are meant to go down when air and slab temperatures are at least 50 degrees and will stay above freezing for the next day or two. Cold slows curing, so the material stays weak for longer and is vulnerable to frost. Heat and wind do the opposite: the surface dries before the cement has fully hydrated, leaving a weak, dusty top that scales early. In summer, resurface in the early morning or evening and avoid direct midday sun on dark concrete.
Watch the forecast for rain. A hard shower on fresh resurfacer can wash out and pit the surface. Most products need several hours to set before light rain is harmless, and longer before heavy rain is. In hot, dry weather, lightly misting the set surface a few times a day helps the cement reach full strength rather than drying out prematurely.
Respect traffic times. Quikrete lists walking on Re-Cap after about eight hours and driving on it after about 24 in normal conditions, while CTS says Rapid Set NewCrete takes foot traffic in as little as two to three hours. Cold weather stretches all of those figures, sometimes considerably.
Timing matters for winter, too. A resurfacer laid in late fall gets little time to cure before the first freeze and the first round of salting, and deicing salt on young cement is one of the fastest routes back to scaling. Avoid rock salt on a surface in its first year, and if you must deice, choose one of the gentler products in our ice melt for concrete guide.
9. Sealing and Long-Term Care
A resurfaced slab is a new cement surface, and it benefits from the same protection new concrete does.
Sealing is not mandatory, but on exterior slabs in freeze-thaw climates it is worth doing. A penetrating silane or siloxane sealer reduces how much water and salt brine the new surface absorbs, which is exactly the mechanism that caused the scaling you just covered. Wait for the resurfacer to cure fully before sealing. Waiting periods vary from a few days to around a month depending on the product and the sealer, so check both labels.
For driveways, see our concrete driveway sealer reviews for products that handle tire traffic and road salt. For patios and walks, our best concrete sealer guide explains the choice between penetrating sealers, which leave the surface looking natural, and film-forming acrylics, which add sheen but need recoating more often.
Maintenance after that is simple. Keep the joint sealant intact and re-seal it when it pulls away, avoid piling salty snow on the slab, and clean oil stains promptly so they do not soak in. Reapply a penetrating sealer every few years, or whenever water stops beading on the surface.
Set realistic expectations. A well-prepared resurfacer on a sound slab can last many years, but it is still a thin layer. Heavy trucks, snowplow blades and steel-wheeled equipment will wear it faster than the original concrete. Treat it as a new wearing surface that needs looking after, not a permanent coat of armor.
10. Resurfacing vs Replacement: The Math
The appeal of resurfacing is cost. A DIY resurfacing job on a driveway costs a small fraction of tearing out and repouring, and it avoids demolition, disposal and days without the driveway.
Material cost is modest. At an eighth of an inch, a 40 pound bag of Re-Cap covers roughly 40 square feet, so a typical single-car driveway needs a stack of bags rather than a truckload of concrete. Add a pressure washer rental, a paddle mixer, a squeegee and some patching material, and most DIY projects stay firmly in the budget tier compared with any replacement quote.
Professional resurfacing, often with spray-applied or stamped decorative overlays, costs more but usually still undercuts replacement. Our driveway resurfacing cost guide breaks down typical per-square-foot pricing for concrete and asphalt, and our sealer vs resurfacer comparison helps if you are not sure the slab needs more than a coat of sealer.
The math flips when the slab is structurally failing. Resurfacing a heaved, badly cracked driveway means paying twice: once now and again for replacement a few years later. If the sounding test turns up widespread hollow areas, or sections have settled noticeably, get a replacement quote before buying any bags.
The middle ground is often the best value. Patch and resurface the sound panels, seal every crack and joint properly, and set aside a budget for the one or two sections that are genuinely failing. That approach buys years of good appearance without pretending a surface coat can fix a problem underneath.
11. Common Mistakes to Avoid
Resurfacing over a sealed or dirty slab
Resurfacer bonds to whatever is on top of the concrete. Over a sealer, oil film or grime, it bonds to that layer and peels off with it, often within weeks. If water beads on the slab, strip or grind it first, then pressure wash thoroughly before a single bag is opened.
Burying the control joints
Joints exist so the slab cracks along a planned line. Cover them with resurfacer and the slab cracks anyway, in a random line through your new surface. Mark every joint before you start, and either keep it open with a strip during application or re-cut it once the resurfacer has set.
Applying it too thick
Resurfacers are built for thin coats, generally no more than about half an inch and ideally an eighth. Poured thick to fill dips, they can shrink, crack and debond. Fill low spots and deep spalls first with a patcher or repair mortar, let them cure, then resurface at the recommended thickness.
Spreading on a dry or puddled slab
A dry slab sucks water out of the mix and weakens the bond; standing water thins it. The target is saturated surface dry: wet enough that the concrete has absorbed all it can, with no puddles on top. Dampen the slab just before spreading and blow out any water sitting in low spots.
Mixing too much at once
Resurfacers give you roughly 20 to 30 minutes of working time, and less in heat. A batch that stiffens before it is spread leaves lap marks and weak spots. Mix partial batches sized to one section, have a helper keep mixing while you spread, and never add water to a mix that has started to set.
12. Frequently Asked Questions
What is the best concrete resurfacer for a driveway?
For most DIY driveway jobs, Quikrete Re-Cap is the best all-round choice. It spreads from a feather edge to half an inch, bonds to properly cleaned and dampened concrete without a separate primer, and takes vehicle traffic after about 24 hours. Sakrete Flo-Coat is a close alternative, and Rapid Set NewCrete suits jobs that must be back in service within hours.
How long does concrete resurfacer last?
On a sound, well-prepared slab with its joints preserved and a penetrating sealer on top, a resurfacer can last many years. The biggest variables are preparation and climate. Resurfacer laid over dirty concrete, over moving cracks, or in late fall just before a hard winter can fail in a single season. Heavy vehicles and plow blades also shorten its life.
Can you resurface concrete that has cracks?
Yes, if the cracks are stable and treated first. Hairline static cracks can be patched and resurfaced over, though they may still show faintly. Moving cracks come straight back through a rigid resurfacer, so seal them with flexible polyurethane and keep them open like joints. Wide or displaced cracks point to a structural problem that resurfacing will not fix.
How thick should concrete resurfacer be?
Most resurfacers perform best at about an eighth of an inch, and the common products are rated from a feather edge up to around half an inch. Thicker is not stronger; over-thick resurfacer can shrink and crack. Fill deeper spalls and dips with a patcher or rapid-set repair mortar first, then apply the resurfacer at its recommended thickness across the slab.
Do I need to seal concrete resurfacer?
It is not required, but it is worthwhile outdoors in freeze-thaw climates. A penetrating silane or siloxane sealer reduces water and salt absorption, which protects the new surface from the same scaling that probably damaged the original slab. Let the resurfacer cure fully first, and check both the resurfacer and sealer labels for the minimum waiting period before sealing.
Can I use concrete resurfacer on a basement or garage floor?
Exterior resurfacers like Re-Cap work on garage floors and can refresh a worn basement slab. If you are laying tile, vinyl plank or carpet over an interior floor, an interior patch and skim coat such as Henry 549 FeatherFinish is the better choice because it trowels smoother and dries much faster. Never use interior-only products outdoors, where they will fail.
Is it cheaper to resurface or replace a concrete driveway?
Resurfacing is almost always cheaper upfront, whether DIY or professional, because it avoids demolition, disposal and new concrete. It is only cheaper overall if the slab is structurally sound. Resurfacing a heaved, badly cracked or hollow-sounding driveway usually means paying for replacement a few years later anyway, so check the slab's condition before comparing quotes.
Related Concrete Repair Guides
Buyer's Guide
Best Concrete Crack Filler
Seal cracks and joints the right way before you resurface, so they do not telegraph through the new surface.
Cost Guide
Driveway Resurfacing Cost
What DIY and professional resurfacing cost for concrete and asphalt, and when replacement makes more sense.
Buyer's Guide
Best Concrete Driveway Sealers
Protect a freshly resurfaced driveway from water, road salt and tire wear.
The Bottom Line
The best concrete resurfacer for most people is Quikrete Re-Cap: forgiving to mix, rated from a feather edge to half an inch, and ready for cars in about a day. Choose Rapid Set NewCrete when downtime matters, Sakrete Flo-Coat as a like-for-like alternative, and use the patchers and Cement All for the deep repairs a resurfacer should never be asked to fill.
The bag is the easy part. A resurfacer only lasts on sound concrete that has been stripped of sealer, pressure washed, patched and dampened, with every control joint preserved and every moving crack sealed with something flexible. Do the prep and it will make an old slab look new for years; skip it and no product on this list will save you.
More in Driveway & Concrete
Guides in this category that pair with what you just read.
About the Author
Alex Rivers, Home Improvement Editor
Alex has spent over a decade working on residential and light commercial property maintenance, and now tests every tool, coating and machine that appears in these guides personally.