The 7 Best Tile Leveling Systems in 2026
We set 400 square feet of porcelain across seven leveling systems, measured lippage with a straightedge, and counted how many clips snapped in the wrong place. Only 7 made the cut.
Alex Rivers
Home Improvement Editor
Last Updated
October 17, 2026
In This Guide
Lippage is the difference in height between two adjacent tiles, and it is the single flaw that separates a professional tile job from an obviously amateur one. Leveling systems exist to hold neighbouring tiles flush while the mortar cures, and they work — but only if you understand what they can and cannot compensate for.
Our Picks at a Glance
The Short Answer
Rubi Delta Leveling System (Best Overall). The system professionals reach for. Reusable wedges, clean breaks, and the most consistent results in our testing.
- Check Price
- Check Price
- Check Price
- Check Price
- Check Price
- Best Threaded System Spin Doctor Tile Leveling System — Threaded Cap, Reusable Caps, Adjustable TensionCheck Price
- Best for Large Format Tuscan SeamClip Leveling System — Strap and Cap, Large Format Specialist, Up to 24 inch TileCheck Price
We may earn a commission when you buy through these links, at no extra cost to you. How we test
Best Overall
Rubi Delta Leveling System
1. What a Leveling System Actually Does
A tile leveling system holds the surfaces of two neighbouring tiles flush with each other while the mortar cures. That is the whole function, and understanding its limits saves a great deal of disappointment.
It Controls Lippage, Not Flatness
Lippage is a local difference in height between two adjacent tile edges. Flatness is whether the floor as a whole runs level across the room. Clips fix the first and do nothing whatsoever about the second. A floor can be perfectly free of lippage and still slope an inch across ten feet.
It Cannot Fix a Bad Subfloor
If the substrate dips, the tile follows the mortar bed, and clips will simply hold two tiles equally out of plane. Industry guidance for large format tile calls for flatness within about an eighth of an inch over ten feet, and reaching that is a levelling compound job, not a clip job.
It Cannot Fix a Warped Tile
Large porcelain tiles frequently have a slight bow through the middle. A leveling system pulls the edges flush, which is what you want, but the crown in the centre remains. On heavily warped tile the answer is a smaller offset pattern, not more clips.
It Buys You Time, Which Is the Real Benefit
Without clips, every tile has to be tapped into plane against its neighbours while the mortar is workable, and any tile you knock while setting the next one has to be corrected immediately. Clips lock the relationship, so you can work across a floor without constantly revisiting what you have already set.
You Do Not Always Need One
Small format tile, mosaic sheets, and anything under about eight inches generally self-aligns well enough that clips add cost and cleanup for no visible gain. The case for a leveling system grows with tile size, and becomes compelling somewhere around twelve inches.
Lippage by the Numbers
1/32"
Typical maximum allowed lippage
1/8"
Required subfloor flatness over 10 ft
12"
Tile size where clips start to pay off
33%
Maximum offset for large format tile
2. Clip and Wedge vs Threaded Cap
Every system here belongs to one of two families, and the choice between them is about hand strength, speed, and how much control you want after the tile is down.
Clip and wedge is faster. A base clip goes under the tile edge, a wedge drives in from the side, and a plier squeezes the wedge home. An experienced installer can place and tension a clip in a couple of seconds, which across a large floor is the difference between a day and a day and a half.
Threaded caps are more controllable. A stem goes under the tile and a threaded cap screws down against it. Tension is set by turning rather than squeezing, so it is repeatable, adjustable, and can be backed off if a tile needs nudging while the mortar is still open.
Hand strength decides it for many people. Squeezing a plier several hundred times in a day is genuinely demanding, and anyone with a weak grip or arthritis will find threaded caps far more comfortable. This is the single most common reason people switch.
Running costs differ in where the money goes. Clip-and-wedge systems consume clips and reuse wedges. Threaded systems consume stems and reuse caps. In both cases the reusable part determines the long-run cost, so buy the system whose reusable component is well made.
Both leave a stem to remove. Neither family avoids the cleanup step. Once the mortar has set, the protruding part is knocked off along the grout line, and any that breaks badly has to be chiselled below the surface before grouting. The systems differ in how often that happens, not whether it does.
3. The 7 Best Tile Leveling Systems in 2026 — Tested & Ranked
We set roughly 400 square feet of porcelain across these seven systems on both plywood and concrete, measured the resulting lippage with a straightedge and feeler gauges, counted how many clips broke badly, and tracked how many cycles each wedge survived before it stopped gripping. These seven earned their place.
At a Glance: How Our Picks Compare
| Product | Type | Rating | Best For |
|---|---|---|---|
| Rubi Delta Leveling System | Clip and Wedge, Reusable Wedges, 1mm and 2mm Clips | 4.7 | Best Overall |
| Perfect Level Master T-Lock | Clip and Wedge, T-Shaped Clip, 1mm to 3mm | 4.5 | Best Value |
| Raimondi RLS Basic | Clip and Wedge, Professional Grade, 1mm to 3mm | 4.6 | Best for Professionals |
| Peygran Tile Leveling System | Clip and Wedge, Reusable Wedge, 1mm and 2mm | 4.5 | Best Reusable Wedges |
| QEP LASH Tile Leveling System | Clip and Wedge, Widely Stocked, 1/16 inch and 1/8 inch | 4.2 | Best Budget |
| Spin Doctor Tile Leveling System | Threaded Cap, Reusable Caps, Adjustable Tension | 4.4 | Best Threaded System |
| Tuscan SeamClip Leveling System | Strap and Cap, Large Format Specialist, Up to 24 inch Tile | 4.5 | Best for Large Format |
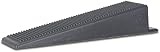
Best OverallRubi Delta Leveling System
Clip and Wedge, Reusable Wedges, 1mm and 2mm Clips
Every clip-and-wedge system works the same way in principle, and the differences that matter show up in two places: whether the clip breaks where it is supposed to, and whether the wedges survive to be used again. Rubi Delta is the best we tested at both. The clip has a defined weak point right at the base, below the tile surface, so a firm kick along the grout line snaps it flush rather than shearing above the tile and leaving a plastic nub you have to dig out before grouting. Across roughly 400 clips we had a handful of bad breaks, which is a far better rate than the budget systems produced. The wedges are the real economic argument. They come out intact, wash clean, and go back in the bucket, which means the recurring cost of the system is clips alone. On a large job that is a meaningful difference, because wedges are the more expensive component and cheap systems chew through them. The pliers are well made and apply even tension without crushing the wedge nose, which is the usual failure on budget tools. The reservations are cost and applicability. The starter kit costs more than most, and no leveling system is worth using on small format tile that self-aligns anyway. Buy it for large format porcelain and it pays for itself on the first job.
Pros
- Wedges are reusable almost indefinitely, which changes the running cost dramatically
- Clips break cleanly at the base rather than shearing above the tile
- Works with tile from 3mm up to 20mm thickness
- Pliers apply consistent tension without crushing the wedge
- Widely available with predictable clip and wedge restocking
Cons
- Higher upfront cost for the pliers and starter kit
- Clips are single use, as with every clip-and-wedge system
- Overkill for small format tile that does not need leveling at all
The Bottom Line
The system professionals reach for. Reusable wedges, clean breaks, and the most consistent results in our testing.

Best ValuePerfect Level Master T-Lock
Clip and Wedge, T-Shaped Clip, 1mm to 3mm
The economics of tile leveling are unforgiving for a homeowner. A single bathroom floor might consume 300 clips, and at premium pricing the consumables can cost more than the tile trim. Perfect Level Master T-Lock solves that with genuinely competitive bulk pricing while giving up very little in performance, which is why it appears on so many one-off renovation jobs. The T-shaped clip head is the notable design difference. Instead of a narrow post pressing on a small area, the T spreads its load across a wider strip of the tile underside, which reduces the chance of a thin or brittle tile cracking at the clip. In our testing with 6mm porcelain that mattered, and we saw no clip-induced cracks. The trade-off is that the wider head needs proper thinset coverage beneath it to bed correctly, so a job with spotty coverage will not hold as well. Breaks were clean and consistent, and the wedges came back out reusable, which keeps the running cost low. The pliers are the weak point. They work and they apply adequate tension, but they feel agricultural next to the premium tools and your hand notices after a few hundred clips. Sizes are also colour coded in a way that is easy to confuse once several are loose in a bucket, so keep them separated.
Pros
- T-shaped clip head spreads load across a wider area of tile
- Excellent price per clip in bulk quantities
- Multiple clip widths available for different grout joint sizes
- Wedges are reusable and hold up well over repeated jobs
- Snaps reliably at floor level with minimal cleanup
Cons
- Pliers are functional rather than refined compared to premium tools
- Wider clip head needs more thinset coverage to sit properly
- Colour coding between sizes is easy to mix up in a bucket
The Bottom Line
Nearly the performance of premium systems at a fraction of the running cost. The sensible pick for a homeowner doing one big floor.

Best for ProfessionalsRaimondi RLS Basic
Clip and Wedge, Professional Grade, 1mm to 3mm
Professional and homeowner tile leveling look identical for the first fifty clips. The difference shows up at five hundred, when cheap pliers have loosened, wedges have deformed, and clip breaks have become unpredictable. Raimondi builds for that volume, and the RLS system is the one you find on commercial jobs for a reason. Clip consistency is the standout. Across our test the RLS clips broke at the intended point more reliably than anything else, which matters enormously when you are working across a large floor on a schedule and cannot afford to stop and chisel out failed stems before grouting. The clip stem is also stiff enough that it does not deflect under the weight of heavy large format porcelain, which is exactly where weaker clips let one edge sag. The availability of dedicated wall pliers is a genuine advantage that most systems ignore. Setting large tile vertically is where lippage is most visible and hardest to control, and a plier designed to reach into a vertical joint makes a real difference. What you are paying for is durability and consistency rather than any different principle, so a homeowner doing one floor will get very similar results from a cheaper system. For anyone tiling weekly, the tooling difference is worth the money within a month.
Pros
- Built for daily commercial use with correspondingly robust tooling
- Very consistent breaking behaviour across hundreds of clips
- Floor and wall pliers available, which matters on vertical work
- Strong clip stem tolerates heavy large format tile without deflecting
- Long track record and easy consumable availability in the trade
Cons
- Premium pricing on both tools and consumables
- Aimed at professionals, so overspecified for a single bathroom
- Wall pliers are a separate purchase
The Bottom Line
The commercial standard. If you set tile for a living, this is the system built for the volume.

Best Reusable WedgesPeygran Tile Leveling System
Clip and Wedge, Reusable Wedge, 1mm and 2mm
The hidden cost of a tile leveling system is not the kit, it is the consumables, and the consumable that determines your running cost is the wedge. Clips are cheap and single use by design. Wedges are meant to be reused, and how many times they survive before the nose deforms is the number that decides what a thousand square feet actually costs you. Peygran wedges were the most durable in our test by a comfortable margin. After several hundred insertions the noses showed wear but still gripped correctly, where two of the budget systems had wedges rounding off and slipping under tension within a couple of hundred. For anyone tiling more than a single room that difference compounds quickly. The rest of the system is straightforward rather than clever. Clip strength is good for the price, the pliers have a smooth and comfortable action, and there are very few ways to use it incorrectly, which is a real virtue for a first-time user. Bulk packs make whole-house jobs economical. The limitations are range and finish. Only the common clip thicknesses are offered, so an unusual grout joint width may not be covered, and on very thin tile the break can leave a small ridge that needs a scrape before grouting. Neither is a serious problem on typical porcelain.
Pros
- Wedges are unusually durable and survive many more cycles than most
- Simple design with very few ways to use it wrong
- Good clip strength for the price point
- Comfortable pliers with a smooth action
- Sold in large bulk packs that suit whole-house jobs
Cons
- Only common clip thicknesses available, limiting unusual joint widths
- Breaking can leave a small ridge on very thin tile
- Less refined finish than premium European systems
The Bottom Line
The best wedge durability we tested. If you are tiling several rooms, the reusability adds up fast.

Best BudgetQEP LASH Tile Leveling System
Clip and Wedge, Widely Stocked, 1/16 inch and 1/8 inch
There is a specific and very common scenario where the best leveling system is whichever one you can buy today: the tile is down to the last two boxes, the mortar is mixed, and you have discovered halfway across the floor that you need leveling clips. QEP LASH is stocked almost everywhere, in inch-denominated sizes that match how American grout joints are specified, and that availability is a genuine feature. Performance is adequate rather than good. On standard thickness porcelain and ceramic it holds tiles flush perfectly well, and for a single bathroom floor most people will never notice the difference between this and a premium system. The problems appear with volume. Our break failure rate — clips shearing above the tile rather than at the base — was noticeably higher than the premium systems, which means more time on your knees with a chisel before you can grout. Wedges also wore out faster, so the running cost advantage narrows on a big job. The pliers are basic, with a stiffer action that becomes tiring across several hundred clips. None of that matters much for one room. Across a whole house it becomes the reason people upgrade. Buy this for a small job or an emergency restock, and buy something better if you are tiling more than a couple of hundred square feet.
Pros
- Stocked in most big-box stores, so restocking mid-job is realistic
- Lowest entry cost of any system here
- Straightforward to use with no learning curve
- Adequate performance on standard thickness porcelain and ceramic
- Clip sizes stated in inches, which matches how joints are specified in the US
Cons
- Wedges wear out considerably faster than premium alternatives
- Higher rate of clips shearing above the tile surface
- Pliers are basic and tiring over a large floor
The Bottom Line
The system you can buy at 8am on a Saturday. Fine for one room, frustrating across a whole house.

Best Threaded SystemSpin Doctor Tile Leveling System
Threaded Cap, Reusable Caps, Adjustable Tension
Clip-and-wedge systems rely on the installer squeezing a plier hard enough, and how hard is enough is a matter of feel that takes a floor or two to learn. Threaded systems replace that judgement with a screw. You place the stem, thread a cap down onto it, and tighten until the tiles pull flush, which is repeatable, adjustable, and requires almost no grip strength. For anyone with arthritis, a weak hand, or simply no desire to squeeze a plier three hundred times, that is a decisive advantage. The adjustability is the second real benefit. With a wedge, tension is set once and modifying it means pulling the wedge and starting over. With a threaded cap you can back it off, nudge a tile, and retighten while the mortar is still open, which is genuinely useful when you are working alone across large format tile and one corner has drifted. The caps are fully reusable, so your only consumable is the stem. The costs are speed and timing. Threading a cap takes longer than driving a wedge, and across a big floor that adds up to real hours. More importantly, the caps have to come off before the mortar fully cures or they bond in place, which makes this a poor choice if you might have to walk away mid-job.
Pros
- Threaded caps are fully reusable, so consumables are stems only
- Tension is adjustable and repeatable rather than dependent on plier feel
- No pliers required, which suits people with limited hand strength
- Caps can be backed off and readjusted before the mortar sets
- Very effective on heavy large format tile
Cons
- Slower to install than wedges on a large floor
- Caps must be removed before the mortar fully cures or they seize
- Stems still snap off and require cleanup like any clip
The Bottom Line
The pick if hand strength is a limitation or you want repeatable, adjustable tension rather than plier feel.

Best for Large FormatTuscan SeamClip Leveling System
Strap and Cap, Large Format Specialist, Up to 24 inch Tile
Lippage tolerance does not scale with tile size, which is the fact that catches people out. Industry guidance allows a fixed maximum height difference between adjacent tiles regardless of how big they are, but a large tile is far more likely to be slightly bowed across its length, and any bow has to be pulled flat at the edges. That is a different job from simply holding two small tiles level, and it needs more force than a standard clip provides. Tuscan is built for exactly that. The strap and cap arrangement generates a strong, well distributed pull-down along the tile edge rather than a point load, which is what large format porcelain needs to sit flush. On 24 inch tile and gauged panels it was clearly the most effective system we tested, holding edges flat where standard clips allowed a visible rise. The dedicated tensioning tool gives repeatable results without guesswork. The case against it is straightforward: cost and scope. It is priced for professionals, it needs its own tool, and on 12 inch tile it does nothing a cheap clip system would not do just as well. If your job is large format, it is worth the money. If it is not, spend the difference on better thinset and a longer straightedge.
Pros
- Designed specifically around large format and gauged porcelain panels
- Very strong pull-down force keeps heavy tile edges genuinely flush
- Strap design distributes force well across long tile edges
- Purpose-built tensioning tool gives consistent results
- Handles the tile sizes where lippage is most visible
Cons
- Expensive, and clearly aimed at the professional market
- Unnecessary for tile under about 12 inches
- Requires its own dedicated tool, which is another purchase
The Bottom Line
Built for the tile sizes that defeat ordinary clips. Overkill below 12 inches, close to essential above 24.
4. Choosing Clip Size and Spacing
Buying the wrong clip size is the most common ordering mistake, and it is easy to avoid once you know that the number on the packet refers to the grout joint, not the tile.
Clip width equals your grout joint. A 2mm clip produces a 2mm joint, so choose the clip to match the joint you want. Rectified porcelain typically takes a joint between 2mm and 3mm; pressed tile with less precise edges needs 3mm or more to absorb the variation.
Check the tile thickness range separately. Every clip has a range of tile thicknesses it accommodates, commonly around 3mm to 12mm. Thick porcelain pavers and gauged panels sit outside standard ranges and need clips specified for them, so read the packet rather than assuming.
Spacing is roughly every eight to twelve inches along a joint. A 12 inch tile typically wants one clip per edge, a 24 inch tile two, and a long plank tile three. The goal is that no unsupported span between clips is long enough for the edge to rise.
Corners need a clip, not four. At a four-way intersection a single clip placed across the joint controls the relationship between all the tiles meeting there. Stacking clips at corners wastes consumables and makes the cleanup worse.
Order about twenty percent more than you calculate. Clips are lost, broken during placement, and used in places you did not plan. Running out mid-floor with mortar open is a far more expensive problem than a leftover bag.
Do the Clip Maths Before You Buy Tile
Take your square footage, work out how many tiles that is, and multiply by the number of clips each tile needs on its unsupported edges. A 200 square foot floor in 12 inch tile needs roughly 400 clips. People routinely buy a bag of 100 and discover the problem halfway across the room.
5. Large Format Tile and Offset Rules
Large format tile is where leveling systems stop being a convenience and become close to mandatory, and it also comes with a rule that surprises most people the first time they hear it.
Never run a fifty percent offset on large tile. The industry guidance limits offset to about a third of the tile length for anything over 15 inches. A running bond at half offset places the centre of one tile — the highest point of any bow — directly against the edge of its neighbour, which guarantees visible lippage.
Warpage is normal, not a defect. Large porcelain is fired at high temperature and comes out with a slight crown. Manufacturers allow for it within a tolerance, so returning tile for it rarely goes anywhere. Designing the layout around it is the practical response.
Back-buttering stops being optional. Large tile needs mortar on the tile as well as the substrate to reach the coverage the manufacturer requires, and voids under a large tile are where cracks start. Clips hold the surface flush but cannot support an unsupported area.
Use a bigger trowel than feels reasonable. Large format tile typically calls for a half inch square notch or larger, and medium bed mortar rather than standard thinset. Trying to set a 24 inch tile with a quarter inch trowel leaves voids no clip can fix.
Two people is the honest requirement. Gauged porcelain panels are heavy, flexible, and unforgiving of being set at an angle. Attempting large panels alone is how they crack before they are even down.
6. Why Mortar Matters More Than Clips
A leveling system is a finishing aid, not a substitute for setting the tile properly. Most floors that fail visually fail because of what is under the tile, not what was clipped to its edges.
Coverage is the number that matters. Standard guidance asks for around eighty percent mortar coverage on a dry interior floor and ninety-five percent in a wet area or exterior installation. Pull a set tile up early in the job and look at the back to check you are actually achieving it.
Comb the mortar in one direction. Swirled trowel patterns trap air and reduce coverage. Straight parallel ridges collapse into each other and push air out to the edge, which is why every manufacturer specifies them.
Do not let the mortar skin over. Thinset that has begun to crust will not bond, and it looks perfectly fine when you set the tile onto it. Comb out only as much as you can cover in a few minutes, and touch it before setting.
Medium bed mortar for large tile. Standard thinset is formulated for a thin bed and shrinks as it cures, which is why a thick application under a large tile pulls unevenly. Medium bed products are designed for the thicker beds large format tile requires.
Clips fight against poor coverage and lose. A tile bedded on high spots of mortar will settle after the clip comes off, and a tile sitting on a void will flex. Neither is a leveling system problem, but both get blamed on one.
7. Using a Leveling System Correctly
The technique is simple and the mistakes are consistent, which means a short list covers almost everything that goes wrong.
Slide the clip under the tile, do not push it in after. The base plate needs to be bedded in mortar under the tile edge, which means placing it before or as the tile goes down. Forcing a clip under a set tile lifts the edge and defeats the point.
Tension the wedge firmly, then stop. The tiles should pull flush and the wedge should be tight. Squeezing harder past that point does nothing useful and is the main cause of clips snapping in place while you work.
Check with a straightedge as you go. Clips control neighbouring tiles relative to each other, which means a drift can accumulate across a floor without any single joint looking wrong. A four foot level laid across every few rows catches it early.
Wait the full cure before removing anything. Knocking clips off too early moves the tile. Overnight is usually the minimum and a full day is safer in cold or humid conditions. If the mortar bag says otherwise, believe the bag.
Kick along the joint, not across it. Striking the clip in line with the grout line snaps it at the base. Striking across the joint levers the tile edge upward and is how people crack a tile after successfully setting it.
Clear every stub before grouting. Any remnant sitting proud of the mortar bed will telegraph through the grout or prevent it filling the joint properly. A quick pass with a chisel or oscillating tool along each joint is worth the twenty minutes.
Before You Buy
8. Frequently Asked Questions
What is the best tile leveling system?
Rubi Delta is the best all-round choice, with the cleanest clip breaks and the most durable reusable wedges. Perfect Level Master T-Lock offers nearly the same performance at a much lower running cost, and Tuscan is the specialist pick for large format tile above 24 inches.
Do I really need a tile leveling system?
Not for small format tile or mosaics, which largely self-align. The case grows with tile size and becomes compelling above about 12 inches, because large tile is more likely to be slightly bowed and any height difference between edges is far more visible on a long joint.
What size tile leveling clips do I need?
The clip width sets your grout joint, so match it to the joint you want: 2mm for rectified porcelain, 3mm or more for pressed tile with less precise edges. Separately, check the clip accommodates your tile thickness, as most standard clips cover roughly 3mm to 12mm.
Can a leveling system fix an uneven floor?
No. It controls lippage between adjacent tiles, not the flatness of the floor overall. If the substrate dips, clips simply hold two tiles equally out of plane. Large format tile needs flatness within about an eighth of an inch over ten feet, which requires levelling compound.
How long do I leave tile leveling clips in place?
Until the mortar has cured enough that the tile will not move, which is normally overnight and safer at a full 24 hours in cold or humid conditions. Removing them early lets tiles shift, and the whole point of the system is to hold the relationship while the mortar sets.
Are tile leveling clips reusable?
Clips and stems are single use by design, as they are meant to snap off below the tile surface. Wedges and threaded caps are reusable, and how many cycles they survive determines your real running cost. Peygran wedges were the most durable in our testing.
9. Common Tile Leveling Mistakes
Leveling system errors tend to be procedural rather than product related. The system usually works; the way it was used did not.
Expecting Clips to Fix the Subfloor
A leveling system holds adjacent tiles flush with each other, which is a completely different thing from making the floor flat. If the substrate dips, the tile follows it and the clips hold two tiles equally out of plane. Check flatness with a straightedge and fix it with levelling compound before any tile goes down.
Running a 50 Percent Offset on Large Tile
A half offset places the crown at the centre of one tile against the edge of the next, which produces visible lippage no clip can pull out. Industry guidance caps offset at about a third of the tile length above 15 inches. Design the layout for the tile you actually bought.
Removing the Clips Too Early
Knocking clips off before the mortar has cured lets the tile move, which undoes the entire job silently. Overnight is the minimum, and a full day is sensible in cold or damp conditions. The temptation to check progress the same evening has cost more than one floor.
Striking Across the Grout Line
A clip snaps cleanly when struck along the joint and levers the tile edge upward when struck across it. Cracking a tile during cleanup, after successfully setting the entire floor, is a particularly frustrating way to lose a tile and it happens constantly.
Related Home Improvement Guides
Buyer's Guide
Best Vinyl Plank Flooring
SPC versus WPC cores, wear layer thickness, and which brands survive real houses.
Buyer's Guide
Best Laser Level
Self-levelling accuracy tested, plus which lines you actually need indoors.
All Guides
Browse All Best Lists
Every hands-on tested guide we have published, organized by category.
The Bottom Line
The best tile leveling system for most people is Rubi Delta, which broke cleanly and reused its wedges longer than anything else we tested. Perfect Level Master T-Lock gets close for far less money, and Tuscan is the answer above 24 inches.
Buy clips to match your grout joint, order twenty percent more than you calculate, and remember that no clip fixes a subfloor that was never made flat.
More in Home Improvement
Guides in this category that pair with what you just read.
About the Author
Alex Rivers, Home Improvement Editor
Alex has spent over a decade working on residential and light commercial property maintenance, and now tests every tool, coating and machine that appears in these guides personally.