The 6 Best Concrete Floor Coatings in 2026
We tested six coatings for adhesion, hot tire pickup, chemical resistance, and how forgiving they are to apply. Prep matters more than product — but product still matters.
Alex Rivers
Home Improvement Editor
Last Updated
October 20, 2026
In This Guide
Almost every concrete floor coating failure traces back to one of two things: the wrong chemistry for the conditions, or inadequate surface preparation. Product choice you can research; preparation you actually have to do. This guide covers both — how the four main coating chemistries genuinely differ, which products we would put on our own floors, and the prep steps that determine whether any of it lasts five years or peels in sheets by next spring.
Our Picks at a Glance
The Short Answer
Rust-Oleum EpoxyShield Professional Floor Coating (Best Overall). The best DIY concrete floor coating for most garages. Skip the acid packet, rent a grinder, and it delivers a genuinely durable floor.
- Check Price
- Check Price
- Check Price
- Check Price
- Check Price
- Best No-Coating Alternative Ghostshield Siloxa-Tek 8500 Penetrating Sealer — Penetrating Sealer (Not a Film Coating)Check Price
We may earn a commission when you buy through these links, at no extra cost to you. How we test
Best Overall
Rust-Oleum EpoxyShield Professional Floor Coating
1. The Four Coating Chemistries, Honestly Compared
Retail labeling in this category is genuinely misleading — products sold as "epoxy" are often one-part latex paint with a small amount of epoxy resin added. Here is what the chemistries actually are.
One-Part Epoxy Paint
Water-based acrylic or latex paint with a modest epoxy content, sold in a single can. Easy to apply, cheap, low odor, and forgiving of imperfect prep. It is also the least durable option by a wide margin — expect two to four years in a garage, with hot tire pickup being the usual failure mode. Legitimate for a basement floor or a low-traffic workshop; a poor choice where a car parks.
Two-Part Epoxy
Resin and hardener mixed on site, curing into a genuinely hard, chemically bonded film. This is the workhorse of the category: strong adhesion, good chemical resistance, and a thickness that levels minor surface imperfections. Its weaknesses are UV sensitivity — epoxy ambers and chalks in direct sunlight — and a relatively long cure that keeps you off the floor for days. High-solids versions are meaningfully more durable than water-based ones.
Polyaspartic
A subset of polyurea chemistry, engineered for fast cure and UV stability. It stays clear rather than ambering, tolerates cold application temperatures that stop epoxy, and can be walked on within hours. The trade is working time: pot life is often 20-45 minutes, which is genuinely unforgiving for a first-time DIYer, and it is the most expensive chemistry here.
Polyurea
The toughest and most flexible option, with excellent abrasion and impact resistance and enough elongation to bridge small cracks rather than crack with them. Usually used as a base coat under a polyaspartic topcoat in professional systems. Very fast cure, very short working time, and the least DIY-friendly of the four.
| Chemistry | Lifespan | UV Stable | DIY Difficulty |
|---|---|---|---|
| One-part epoxy paint | 2-4 yr | Moderate | Easy |
| Two-part epoxy | 5-10 yr | No — ambers | Moderate |
| Polyaspartic | 10-20 yr | Yes | Hard — short pot life |
| Polyurea | 10-20 yr | Yes | Hardest |
2. The 6 Best Concrete Floor Coatings in 2026
We applied each product to prepared test slabs and evaluated adhesion by cross-hatch testing after full cure, hot tire pickup by parking on the surface after a highway drive, chemical resistance against gasoline, brake fluid, and de-icing salt, and abrasion resistance under repeated traffic. We also tracked how forgiving each was to apply.

Best OverallRust-Oleum EpoxyShield Professional Floor Coating
Two-Part Epoxy Kit
EpoxyShield Professional is the product we would hand to someone coating their first garage floor, because it balances real durability against a workable margin for error. It is a genuine two-part epoxy rather than a one-part paint with epoxy in the name, and after a full seven-day cure it passed our hot tire test cleanly — parking a car with highway-warm tires produced no lifting, which is the specific failure that ruins cheaper coatings. Chemical resistance was strong across gasoline, motor oil, and brake fluid, with no softening or staining after prolonged contact. Pot life of roughly 45 minutes is generous by two-part standards, which matters enormously when you are working alone and moving slower than a professional crew would. The included flakes, cleaner, and instructions make the kit genuinely self-contained. Two caveats matter. The kit supplies an acid etch packet as the surface preparation method, and acid etching fails on hard-troweled floors — which describes most modern garage slabs. Rent a grinder for about $100 a day instead; it is the single highest-value decision in the project and the difference between a five-year floor and a peeling one. Second, epoxy ambers under UV, so if your garage door faces south and stays open, plan on a UV-stable topcoat.
Pros
- Genuine two-part epoxy that passed our hot tire test after a full seven-day cure
- Kit includes decorative flakes, a cleaner, and clear instructions aimed at first-timers
- Excellent chemical resistance against gasoline, oil, and brake fluid in testing
- Widely available at home centers with good color consistency between kits
- Reasonable pot life of roughly 45 minutes, forgiving for a DIY pace
Cons
- Includes an acid etch packet rather than requiring grinding — etching is the weaker prep method
- Ambers under direct UV, so a sunny south-facing garage door will show discoloration
The Bottom Line
The best DIY concrete floor coating for most garages. Skip the acid packet, rent a grinder, and it delivers a genuinely durable floor.

Best DurabilityLeggari Polyaspartic Floor Coating System
Polyaspartic, Two-Coat System
Polyaspartic is what professional installers use when the customer wants a floor that will not need attention for a decade, and the Leggari system brings that chemistry into reach for a well-prepared DIYer. Two properties set it apart from epoxy. It is genuinely UV stable, staying clear through our accelerated exposure testing where epoxy samples visibly ambered — which matters for any garage with a door that stays open or a shop with skylights. And it cures fast: walkable in hours, drivable in about a day, against five to seven days for epoxy. That transforms a project from a week of displacement to a weekend. Abrasion resistance was the best in this test, and it can be applied at temperatures where epoxy simply will not cure, extending the workable season considerably in cold climates. The catch is pot life. Twenty to thirty minutes is not much time when you are mixing, cutting in edges, rolling, and broadcasting flakes, and material that gels in the pail is money on the floor. This is a product for someone who has coated a floor before, or who has a helper and a genuinely well-rehearsed plan with everything staged in advance. It also costs considerably more than epoxy. For a floor you want to stop thinking about, it is worth both.
Pros
- UV stable — stayed clear with no ambering through our accelerated exposure testing
- Cures fast enough to walk on within hours and drive on within a day
- Applies successfully at temperatures well below where epoxy stalls
- Best abrasion resistance of anything we tested
- Expected service life of 10-20 years, several times that of a good epoxy
Cons
- Pot life of roughly 20-30 minutes is genuinely unforgiving for a first-time applicator
- Substantially more expensive than epoxy kits
The Bottom Line
The most durable coating you can apply yourself, if you can work fast. UV stability and cold-temperature application are real advantages over epoxy.

Best for Basements & PatiosBehr Premium Granite Grip Concrete Coating
One-Part, Textured
Not every concrete floor is a garage floor, and Granite Grip is the product we recommend for the ones that are not. Its textured, aggregate-loaded finish delivers genuinely useful slip resistance when wet — a meaningful safety benefit on basement stairs' landings, patios, and pool surrounds where a smooth epoxy becomes treacherous. The single-part formulation removes every timing constraint that makes two-part products stressful: no mixing ratios, no pot life, no working against a clock, and you can stop for lunch. Low odor and water cleanup make it practical for an enclosed basement where solvent-based products would be unpleasant or unsafe. It also hides surface imperfections better than anything else here, since the texture breaks up the visual read of minor spalling and patch marks that a glossy coating would highlight. What it is not is a garage coating. In our hot tire testing it lifted where two-part products held, which is the predictable behavior of one-part chemistry, and no amount of careful preparation changes that. The texture is also a maintenance trade-off: it grips dirt as well as it grips shoes, and sweeping it clean takes more effort than a smooth floor. Used where it belongs, it is excellent value.
Pros
- Textured finish provides genuinely good slip resistance when wet
- Single-part application with no mixing, pot life, or timing pressure
- Hides minor surface imperfections better than any smooth coating here
- Low odor and water cleanup, practical for enclosed basement application
- Very affordable per square foot
Cons
- Not durable enough for a garage floor where vehicles park — hot tire pickup is likely
- Textured surface traps dirt and is harder to sweep clean than a smooth coating
The Bottom Line
The right choice for a basement, patio, or workshop where slip resistance matters and cars do not park. Wrong for a garage.

Best Thick-Build EpoxyArmorPoxy 100% Solids Epoxy
High-Solids Two-Part Epoxy
Most retail epoxies are water-based and 40-50% solids, meaning half of what you roll on evaporates and the finished film is far thinner than what you spread. ArmorPoxy's 100% solids formulation keeps everything: the thickness you apply is the thickness you get, which in practice means a single coat builds a film several times heavier than a typical kit. That matters for a floor that takes real abuse. In our testing it had the best impact resistance of any epoxy here, shrugging off dropped tools that chipped thinner coatings, and its self-leveling character smoothed minor surface imperfections that would have read through a thin film. Chemical resistance was excellent across the board, and cross-hatch adhesion testing on properly ground concrete was among the strongest results we recorded. The costs are physical and practical. This is thick, heavy material, and spreading it evenly across a large floor is genuinely tiring work that goes faster with two people and a notched squeegee than with a roller alone. Odor during application is strong enough to require cross-ventilation and a proper respirator, not a dust mask. And like all epoxy, it ambers under UV. For a workshop floor that will see dropped tools, solvents, and heavy traffic, it is the right specification.
Pros
- 100% solids means the film thickness you apply is the thickness you keep — no shrinkage
- Self-leveling character fills and smooths minor surface imperfections
- Excellent impact and chemical resistance, suitable for a working shop floor
- A single coat builds far more thickness than typical water-based epoxy
- Strong adhesion in our cross-hatch testing on properly profiled concrete
Cons
- Heavy, thick material that is physically demanding to spread over a large floor
- Strong odor during application requires real ventilation and a respirator
The Bottom Line
The most substantial epoxy film you can apply. Ideal for a working shop floor; more product than a light-duty garage needs.
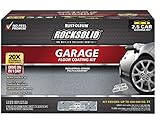
Best Easy ApplicationRust-Oleum RockSolid Polycuramine
Hybrid Polyurea/Epoxy
Mixing errors are one of the quiet causes of two-part coating failure — a ratio off by 10% produces a film that never fully cures and stays soft indefinitely. RockSolid removes that risk entirely with a burst pouch: you step on a divider, knead the pouch to combine the parts, and pour. There is no measuring, no ratio to get wrong, and no partially mixed material lurking at the bottom of a pail. The chemistry inside is a polyurea-epoxy hybrid that is genuinely tougher than standard water-based epoxy, and in our testing it resisted hot tire pickup well after proper cure. High solids content means it builds meaningful thickness in one coat, and being a one-coat system rather than primer-plus-topcoat, it saves a full day of project time. The constraint is the clock. Once that pouch is activated you have roughly 20 minutes, and the material does not care whether you are ready. Everything — roller, extension pole, flakes, cut-in brush, your planned path out of the garage — needs to be staged before you break the divider. Coverage per kit is also modest, so measure your floor carefully and buy enough; running short mid-application with a 20-minute pot life is not a recoverable situation.
Pros
- Burst pouch mixing removes the ratio errors that ruin two-part applications
- Hybrid chemistry is meaningfully tougher than standard water-based epoxy
- High-solids formula builds good thickness in a single coat
- Good hot tire resistance in our testing after proper cure
- One-coat system saves a full day compared to primer-plus-topcoat kits
Cons
- Short working time of roughly 20 minutes once the pouch is activated
- Coverage per kit is limited, so larger garages need careful quantity planning
The Bottom Line
The most foolproof mixing system here, wrapped around genuinely durable chemistry. Just have your plan ready before you break the pouch.

Best No-Coating AlternativeGhostshield Siloxa-Tek 8500 Penetrating Sealer
Penetrating Sealer (Not a Film Coating)
Every film coating shares the same failure modes: it can delaminate, it can blister from vapor pressure, and it can pick up on hot tires. A penetrating sealer has none of them, because there is no film to fail. Siloxa-Tek 8500 soaks into the concrete and lines the capillary pores with a hydrophobic silane-siloxane barrier, dramatically reducing absorption of water, oil, and de-icing salts. In testing, treated concrete repelled spilled oil long enough to wipe it up cleanly where untreated concrete absorbed it within minutes — which for many garage owners is the actual problem they were trying to solve. Its most valuable application is on slabs that fail the plastic-sheet moisture test. Where vapor migration would blister an epoxy from below, a penetrating sealer is unaffected because moisture can still pass through. Prep is minimal, there is no pot life, and there are no cure restrictions keeping you from driving on it. The honest limitations follow from the mechanism. It does not change appearance, so stains, patch marks, and discoloration all remain visible — if your goal is a floor that looks finished, this is not it. And it adds no abrasion layer, so the concrete surface itself continues to wear normally. As protection rather than transformation, it is excellent.
Pros
- Penetrates rather than filming, so it cannot peel, delaminate, or pick up on hot tires
- Works on damp or moisture-emitting slabs where film coatings fail
- No change to appearance or traction — the floor looks like bare concrete
- Dramatically reduces oil, water, and salt absorption into the slab
- Minimal prep required and no cure-time restrictions on driving
Cons
- Does not hide stains, patches, or surface imperfections — appearance is unchanged
- Provides no abrasion layer, so the concrete surface itself still wears
The Bottom Line
The right answer for a slab with moisture problems or an owner who does not want the risk of a film coating. Protection without the failure modes.
3. Surface Preparation: The Part That Decides Everything
If a coating peels, the odds are overwhelming that prep was the reason rather than the product. Concrete straight from the trowel is too smooth and too closed for a coating to grip, and any oil, sealer, or curing compound blocks adhesion entirely.
Step 1: Test for an Existing Sealer
Pour a cup of water on the floor in several places. If it beads or sits on the surface rather than darkening the concrete within a minute, there is a sealer present and it must be removed before anything will bond. Grinding is the reliable method; chemical strippers work but rarely completely.
Step 2: Deal With Oil Completely
Coatings do not bond to oil-contaminated concrete, and oil that soaked in years ago is still down there. Degrease thoroughly, then grind the affected areas — grinding is what actually removes the contaminated surface layer. A visibly clean stain is not the same as clean concrete.
Step 3: Profile the Surface
The concrete needs a texture roughly like 120-grit sandpaper for coatings to key into. Two methods work: mechanical grinding with a rented walk-behind grinder and a diamond cup wheel, or acid etching with a muriatic or citric acid solution. Grinding is dramatically better and produces consistent results; etching is cheaper and easier but fails on hard-troweled or sealed floors, which is the most common cause of DIY coating failure.
Step 4: Test for Moisture
Tape a two-foot square of plastic sheeting tightly to the floor and leave it 24 hours. Condensation underneath, or a darkened patch of concrete, means moisture is migrating up through the slab, and that vapor pressure will lift most coatings from below. Slabs without a vapor barrier — common in older homes and basements — need a moisture-tolerant system specifically designed for the condition.
Step 5: Repair, Then Vacuum Thoroughly
Fill cracks and spalls with an appropriate patching compound and let them cure fully. Then vacuum the floor with a shop vac, twice — grinding dust is fine enough to remain after sweeping and will sit between the coating and the concrete like a release agent.
Grinding Beats Etching, Every Time
Acid etching is included in most DIY kits because it is cheap and requires no equipment rental. It also fails on hard-troweled garage floors, which describes most modern slabs, producing a floor that looks etched but has almost no profile. A rented grinder is roughly $100 a day and is the single highest-value decision in the entire project.
4. Application: Getting a Good Result
Once prep is done, application is straightforward, but the failure modes are unforgiving and mostly about timing.
Watch the Temperature and Dew Point
Most epoxies want 55-85°F, and cure stalls badly below that. More importantly, the slab temperature must be at least 5°F above the dew point during application and initial cure, or moisture condenses on the surface and causes blushing or adhesion failure. Check the forecast for slab temperature, not just air temperature, and remember that concrete lags air temperature by hours.
Respect Pot Life
Two-part products begin curing the moment they are mixed, and once the pot life is gone, the material is unusable regardless of how much is left in the pail. Epoxy typically gives 30-60 minutes; polyaspartic can be as little as 20. Mix only what you can spread in that window, work in sections, and have everything laid out before you mix the first batch.
Cut In, Then Roll, Then Keep Moving
Cut edges with a brush a section at a time, then roll toward the exit with a 3/8-inch nap roller on an extension pole. Maintain a wet edge and do not go back to touch up an area that has begun to set — it will show. Plan your path so you never coat yourself into a corner.
Broadcast Flakes While Wet
If you are using decorative flakes, throw them upward and let them fall randomly rather than casting them at the floor, which produces visible clumping patterns. Do it while the base coat is still wet, and do it more sparsely than feels right — you can always add more.
Respect the Cure, Especially Before Driving On It
Foot traffic is usually fine within 24 hours, but vehicle traffic needs the full cure — often 5 to 7 days for epoxy. Parking early is the most common cause of hot tire pickup, where warm tires soften and lift a not-fully-cured coating. This is the single most preventable failure in the whole project.
5. Hot Tire Pickup and Other Failure Modes
Four things go wrong with concrete floor coatings, and each has a specific cause.
Hot Tire Pickup
Tires reach well over 100°F on a highway drive, and hot rubber plasticizes softer coatings, lifting them when the car is moved. It is the classic failure of one-part epoxy paints and of two-part products driven on before full cure. Prevention: use a two-part product, prepare the surface properly, and stay off it with a vehicle for the full cure period.
Delamination From Poor Prep
The coating comes up in sheets with clean concrete underneath, usually starting at an edge. This means the coating never bonded — sealer, oil, dust, or insufficient profile. There is no repair short of removing and redoing the affected area, which is why prep is worth the extra day.
Blistering and Bubbling From Moisture
Small bubbles or blisters appearing days after application usually mean vapor is pushing up through the slab. This is why the plastic-sheet moisture test matters before you buy anything. Slabs with active moisture need a moisture-mitigating primer or a system rated for high vapor transmission.
Yellowing and Chalking
Epoxy ambers under UV, so a garage with a south-facing door that stays open will show discoloration within a year or two. It is cosmetic rather than structural, and the fix is a UV-stable polyaspartic or polyurethane topcoat over the epoxy. In direct-sun applications, skip epoxy as a topcoat entirely.
6. DIY or Hire It Out?
The cost gap is large, and so is the difference in what you get.
| Approach | Cost per Sq Ft | 400 Sq Ft Garage |
|---|---|---|
| DIY one-part paint | $0.40-0.80 | $160-320 |
| DIY two-part epoxy kit | $1-2.50 | $400-1,000 |
| DIY polyaspartic system | $2.50-5 | $1,000-2,000 |
| Professional polyurea/polyaspartic | $5-12 | $2,000-4,800 |
What Professionals Actually Bring
Diamond grinding or shot blasting rather than acid etching, which is the largest single quality difference. Fast-cure polyurea and polyaspartic systems with pot lives too short for a first-timer to manage. Moisture testing and mitigation when needed. And a warranty on adhesion, which is the failure a homeowner cannot easily fix.
When DIY Makes Sense
A two-part epoxy kit on a clean, dry, well-prepared slab is a genuinely achievable weekend project with a good outcome — provided you rent a grinder rather than relying on the acid packet in the box. If the floor has moisture issues, heavy oil contamination, or you want a polyaspartic system, the professional route is worth the money.
7. Keeping a Coated Floor Looking New
Coated floors are low maintenance, but a few habits meaningfully extend their life.
Sweep Grit Regularly
The main wear mechanism on a coated floor is abrasion from sand and grit ground under tires and shoes. A dust mop or soft broom every week or two does more for longevity than anything else.
Clean Chemical Spills Promptly
Good two-part coatings resist gasoline, oil, and antifreeze well, but prolonged contact still degrades the finish. Brake fluid is the harshest common garage chemical and should be wiped up immediately.
Manage De-Icing Salt in Winter
Salt tracked in from winter roads pools under vehicles and is aggressive on both the coating and the concrete at any pinholes. Rinse the floor after heavy salt exposure and consider absorbent parking mats through the winter months.
Use Mats Under Jack Stands and Kickstands
Point loads from jack stands, motorcycle kickstands, and trailer tongues can dent or puncture any coating. A scrap of plywood or a rubber pad under concentrated loads prevents the most common cosmetic damage.
Recoat Before It Wears Through
Most systems can be recoated by scuff-sanding and applying a fresh topcoat, which is dramatically cheaper than a full redo. Watch the high-traffic path from the door and recoat when the finish there starts to dull, not after it wears down to concrete.
Before You Buy
8. Frequently Asked Questions
What is the best concrete floor coating?
For most garages, Rust-Oleum EpoxyShield Professional is the best DIY choice — genuine two-part epoxy that resists hot tire pickup after full cure. For maximum durability and UV stability, a polyaspartic system like Leggari lasts 10-20 years. For a basement or patio where slip resistance matters more than vehicle durability, a textured one-part coating is the better fit.
How long does a concrete floor coating last?
One-part epoxy paints last 2-4 years in a garage. Two-part epoxy lasts 5-10 years. Polyaspartic and polyurea systems last 10-20 years. Those figures assume proper surface preparation — a coating over an unprepared or oil-contaminated slab can fail within a single season regardless of chemistry.
Do I need to grind my concrete before coating it?
Grinding is strongly recommended and is the single biggest factor in whether a coating lasts. Acid etching, which most DIY kits include, fails on hard-troweled floors — which describes most modern garage slabs — leaving almost no profile for the coating to grip. A rented walk-behind grinder runs about $100 a day and is the best money spent on the project.
What is hot tire pickup and how do you prevent it?
Tires reach well over 100°F after highway driving, and hot rubber softens weaker coatings, lifting them when the car moves. Prevent it three ways: use a genuine two-part product rather than one-part paint, prepare the surface by grinding, and stay off the floor with a vehicle for the full cure period — usually 5-7 days for epoxy.
Is polyaspartic better than epoxy?
For durability and UV stability, yes — polyaspartic stays clear where epoxy ambers, resists abrasion better, cures in hours rather than days, and applies at lower temperatures. The trade-offs are cost and a pot life as short as 20 minutes, which is genuinely difficult for a first-time applicator working alone.
Can you coat a concrete floor that has moisture problems?
Not with a standard film coating — vapor pressure from below will blister or delaminate it. Test first by taping a two-foot square of plastic to the floor for 24 hours; condensation underneath means moisture is present. Those slabs need a moisture-mitigating primer, a system rated for high vapor transmission, or a penetrating sealer instead of a film.
How much does it cost to coat a garage floor?
DIY with a two-part epoxy kit runs $1-2.50 per square foot, or $400-1,000 for a typical 400 square foot garage. A DIY polyaspartic system runs $2.50-5 per square foot. Professional polyurea and polyaspartic installation runs $5-12 per square foot, or $2,000-4,800 for the same garage.
9. Mistakes That Ruin a Concrete Floor Coating
Coating failures are almost always preventable, and almost always decided before the first drop hits the floor.
Acid Etching Instead of Grinding
Acid etching is included in DIY kits because it is cheap, and it fails on hard-troweled floors — which is most modern garage slabs. The result looks etched but has almost no profile for the coating to key into. Rent a grinder; it is roughly $100 and it is the difference between a five-year floor and a peeling one.
Coating Over Oil-Contaminated Concrete
Coatings do not bond to oil, and oil that soaked in years ago is still in the slab. Degreasing removes what is on the surface; grinding removes the contaminated layer. A visibly clean stain is not clean concrete, and this is the most common cause of localized peeling.
Skipping the Moisture Test
Tape a two-foot square of plastic to the floor for 24 hours. Condensation underneath means vapor is migrating up through the slab, and it will blister a film coating from below within months. Slabs without a vapor barrier need a moisture-tolerant system or a penetrating sealer instead.
Driving on It Before Full Cure
Foot traffic is usually fine within 24 hours, but a vehicle needs the full cure — often 5-7 days for epoxy. Parking early is the single most preventable cause of hot tire pickup, and it ruins an otherwise perfectly executed floor.
Mixing More Than You Can Spread
Two-part products begin curing when mixed, and once pot life is gone the material is waste regardless of how much remains. Epoxy gives 30-60 minutes; polyaspartic can give 20. Mix in batches sized to a section, and stage every tool before you mix the first one.
Related Concrete Guides
Buyer's Guide
Best Garage Floor Epoxy
Epoxy kits specifically, ranked on adhesion, thickness, and hot tire resistance.
Comparison
Polyaspartic Floor Coating
Is polyaspartic really better than epoxy? Cure time, UV stability, and cost compared.
How-To
How to Get Oil Out of Concrete
Coatings will not bond over oil — remove it properly before you prep the floor.
The Bottom Line
The best concrete floor coating depends on the floor. For a typical garage, Rust-Oleum EpoxyShield Professional is the right balance of durability and DIY forgiveness. For a floor you want to forget about for a decade, a polyaspartic system is worth the cost and the short pot life. For a basement or patio, a textured one-part coating gives you the slip resistance that matters there.
Whatever you choose, the outcome is decided by preparation. Rent a grinder instead of acid etching, test for moisture with a taped plastic square, and stay off it with a vehicle for the full cure. Those three steps prevent nearly every coating failure there is.
More in Driveway & Concrete Sealers
Guides in this category that pair with what you just read.
About the Author
Alex Rivers, Home Improvement Editor
Alex has spent over a decade working on residential and light commercial property maintenance, and now tests every tool, coating and machine that appears in these guides personally.