The 7 Best Circuit Breaker Finders in 2026
We mapped three panels — a tidy new one, a crowded old one, and a sub panel behind a boiler — with seven finders, and counted how often each pointed at the wrong breaker.
Alex Rivers
Home Improvement Editor
Last Updated
October 18, 2026
In This Guide
Finding which breaker feeds a particular outlet is one of those jobs that sounds trivial and reliably consumes an afternoon. A breaker finder replaces the walk-back-and-forth method with a transmitter in the outlet and a receiver at the panel, and the difference between a good one and a poor one is entirely in how many breakers it thinks are the right one.
Our Picks at a Glance
The Short Answer
Klein Tools ET450 Circuit Breaker Finder (Best Overall). The one that most reliably points at a single breaker. Automatic sensitivity is what separates it from the cheap tools.
- Best Overall Klein Tools ET450 Circuit Breaker Finder — Transmitter and Receiver, GFCI Test, Auto SensitivityCheck Price
- Best Value Extech CB10 Circuit Breaker Finder — Transmitter and Receiver, Adjustable Sensitivity, GFCI TestCheck Price
- Best Professional Tool Fluke 2042 Cable Locator — Cable Locator and Breaker Finder, Live and Dead Circuits, Depth TracingCheck Price
- Best for Crowded Panels Ideal 61-534 SureTest Circuit Tracer — Transmitter and Receiver, Digital Sensitivity, ProfessionalCheck Price
- Best Budget Sperry Instruments CS61200 Breaker Finder — Transmitter and Receiver, Manual Sensitivity, BudgetCheck Price
- Best Multi Purpose Triplett Fox and Hound 9610 — Tone Generator and Probe, Energised and De-Energised, Multi UseCheck Price
- Best Simple Operation Southwire 40130S Circuit Breaker Finder — Transmitter and Receiver, GFCI Test, Auto ScanCheck Price
We may earn a commission when you buy through these links, at no extra cost to you. How we test
Best Overall
Klein Tools ET450 Circuit Breaker Finder
1. How Breaker Finders Actually Work
Understanding the mechanism explains both why these tools sometimes indicate on several breakers and what you can do about it.
The Transmitter Modulates the Circuit
Plugged into an outlet, the transmitter draws a rapidly pulsed load, or in some designs injects a distinct signal onto the conductors. Either way it creates a distinctive pattern of current that travels back along the circuit to the panel.
The Receiver Detects a Magnetic Field
Current flowing in a wire produces a magnetic field around it. The receiver is an inductive pickup tuned to the transmitter's pattern, so passing it over the breakers detects the field around the conductor carrying that specific signal.
Adjacent Conductors Pick Up the Signal Too
Wires running together in a panel and along the same route through the building couple with each other, so the signal appears weakly on neighbours. That is why a finder set to high sensitivity indicates on several breakers, and why reducing sensitivity is the technique that isolates one.
The Circuit Must Usually Be Live
Most transmitters draw their power from the circuit they are plugged into, which means a dead circuit produces no signal. Tone generators and professional locators inject their own signal and work on de-energised conductors, which is the main functional difference between the categories.
Confirmation Still Belongs to a Voltage Tester
A breaker finder tells you which breaker to switch off. It does not tell you that the circuit is dead. Verifying that with a voltage tester at the outlet, before touching anything, is the step that keeps the tool a convenience rather than a hazard.
What Matters in a Finder
1
Breakers a good finder indicates on
3-4
Passes a manual budget tool needs
Live
Circuit state most finders require
Always
Verify dead with a voltage tester
2. What to Look For When Choosing
The specifications that matter are not the ones usually advertised, and a few features change the experience considerably.
Sensitivity control is the most important feature. Whether automatic or manual, the ability to step sensitivity down is what isolates one breaker from its neighbours. A tool with a fixed sensitivity will always indicate on a group.
Numeric signal strength beats a simple beep. On a crowded panel where several breakers register, a number tells you which registers most strongly. A binary indicator leaves you guessing between three candidates.
A GFCI test function is worth having. It costs the manufacturer very little to include and it means you can verify GFCI protection while already at the outlet, which is a job most people never get around to otherwise.
Receiver size matters more than you expect. Sweeping a receiver across breakers inside a crowded panel with a dead front removed is fiddly, and a bulky receiver makes it worse. Compact tools are genuinely easier to use in the situations that are already difficult.
Check whether it works through a closed panel door. Some finders detect strongly enough to work with the door shut, which is faster and safer since it avoids removing the dead front at all. Others require direct access to each breaker.
Consider whether you need de-energised tracing. If your use case is renovation work with dead circuits, an ordinary finder is the wrong tool entirely and you need a tone generator or a professional locator.
3. The 7 Best Circuit Breaker Finders in 2026 — Tested & Ranked
We tested each finder on three panels: a tidy modern 200 amp panel with clearly separated circuits, a crowded 1970s panel with bundled wiring and forty breakers, and a sub panel behind a boiler at the far end of a long feeder. For every circuit we recorded whether the tool indicated a single breaker, how many passes it took, and whether the answer was correct when verified. These seven earned their place.
At a Glance: How Our Picks Compare
| Product | Type | Rating | Best For |
|---|---|---|---|
| Klein Tools ET450 Circuit Breaker Finder | Transmitter and Receiver, GFCI Test, Auto Sensitivity | 4.6 | Best Overall |
| Extech CB10 Circuit Breaker Finder | Transmitter and Receiver, Adjustable Sensitivity, GFCI Test | 4.4 | Best Value |
| Fluke 2042 Cable Locator | Cable Locator and Breaker Finder, Live and Dead Circuits, Depth Tracing | 4.7 | Best Professional Tool |
| Ideal 61-534 SureTest Circuit Tracer | Transmitter and Receiver, Digital Sensitivity, Professional | 4.5 | Best for Crowded Panels |
| Sperry Instruments CS61200 Breaker Finder | Transmitter and Receiver, Manual Sensitivity, Budget | 4.2 | Best Budget |
| Triplett Fox and Hound 9610 | Tone Generator and Probe, Energised and De-Energised, Multi Use | 4.3 | Best Multi Purpose |
| Southwire 40130S Circuit Breaker Finder | Transmitter and Receiver, GFCI Test, Auto Scan | 4.3 | Best Simple Operation |

Best OverallKlein Tools ET450 Circuit Breaker Finder
Transmitter and Receiver, GFCI Test, Auto Sensitivity
Every breaker finder works the same way in principle, and the difference between them is almost entirely about sensitivity. Too sensitive and the receiver lights up on six adjacent breakers; not sensitive enough and it never finds the right one at all. The cheap tools give you a manual dial and leave you to hunt for the right setting, which in practice means several passes down the panel adjusting as you go. The Klein ET450 adjusts automatically, stepping its own sensitivity down as it narrows the field, and in our testing that produced a single confident hit far more often than any manual tool. On the tidy modern panel it identified the correct breaker first pass every time. On the crowded old panel, where breakers sit close together and wiring runs bundled, it needed a second sweep on two circuits out of twelve, which was still the best result of the group. The GFCI test built into the transmitter is a genuinely useful addition, letting you verify protection while you are already at the outlet. Build quality is what you expect from Klein: it survived being dropped onto a concrete basement floor without complaint. The reservations are minor. It costs more than the budget tools, and on very densely packed panels the automatic sensitivity occasionally benefits from being overridden manually.
Pros
- Automatic sensitivity adjustment that genuinely narrows down to one breaker
- Built in GFCI test function on the transmitter
- Clear audible and visual indication that is easy to read at a panel
- Robust construction that survives being dropped in a basement
- Detects the circuit through a closed panel door on most installations
Cons
- More expensive than basic finders
- Automatic sensitivity occasionally needs a manual override on very crowded panels
- Transmitter only works on live circuits
The Bottom Line
The one that most reliably points at a single breaker. Automatic sensitivity is what separates it from the cheap tools.

Best ValueExtech CB10 Circuit Breaker Finder
Transmitter and Receiver, Adjustable Sensitivity, GFCI Test
The honest truth about breaker finders is that a competent one costs a fraction of what an electrician charges for the hour it saves, which makes the value calculation lopsided in favour of buying something adequate rather than something perfect. The Extech CB10 is squarely adequate, with a manual sensitivity dial that works well once you develop a feel for it and accuracy on standard residential panels that is close to the premium tools. On our tidy modern panel it found the correct breaker within two passes on every circuit. The manual sensitivity is both the compromise and, for some users, a feature. Starting at maximum and stepping down while sweeping is a technique that takes ten minutes to learn and then works reliably, and it gives you direct control on panels where automatic tools sometimes settle on the wrong sensitivity. The cost is time: expect two or three passes rather than one. Performance drops off on sub panels, where the signal has further to travel and more shared conductors to confuse it, and that is where the premium tools earn their price. Construction is lighter than the professional options and the plastic feels it, though nothing failed during testing. The included GFCI test is a useful extra at this price.
Pros
- Good accuracy for the price, with a usable manual sensitivity control
- Includes GFCI testing on the transmitter
- Compact receiver that fits easily into a crowded panel
- Bright indicator that is readable in a dim basement
- Reliable performance on standard residential panels
Cons
- Manual sensitivity means more passes than an automatic tool
- Struggles more than premium units on sub panels
- Plastic construction feels less durable
The Bottom Line
Most of the accuracy at a fraction of the price. You pay for it in extra passes down the panel.

Best Professional ToolFluke 2042 Cable Locator
Cable Locator and Breaker Finder, Live and Dead Circuits, Depth Tracing
A conventional breaker finder answers exactly one question: which breaker feeds this outlet. The Fluke 2042 belongs to a different category of instrument, tracing the physical route of a cable through walls, floors and ground, finding breaks and shorts along its length, and estimating depth. Identifying a breaker is something it does incidentally. For an electrician working on unfamiliar installations, that broader capability is the point. Finding where a buried feeder runs before digging, or locating the break in a circuit that has stopped working, are problems no consumer finder can address at all. The ability to work on de-energised circuits is the other significant difference. Ordinary finders require a live circuit because the transmitter draws power from it. The Fluke injects its own signal, which means it works on a circuit that is dead, disconnected, or not yet terminated — exactly the situations that arise during renovation work. What rules it out for most people is price and complexity. It costs many times what a good consumer finder does, and it takes genuine practice to interpret its readings confidently. If your requirement is knowing which breaker to switch off before changing a light fitting, this is an extraordinary amount of instrument for the job.
Pros
- Traces cables inside walls and underground as well as identifying breakers
- Works on de-energised circuits, which ordinary breaker finders cannot
- Locates breaks and short circuits along a run
- Depth estimation for buried and in-wall cables
- Professional build quality with a serious warranty
Cons
- Very expensive, priced for professional use rather than homeowners
- Considerably more complex to learn and operate
- Overkill if all you need is to identify a breaker
The Bottom Line
Not really a breaker finder — a full cable locator that happens to do breakers too. Superb, and priced accordingly.

Best for Crowded PanelsIdeal 61-534 SureTest Circuit Tracer
Transmitter and Receiver, Digital Sensitivity, Professional
The hardest breaker finding job is a panel with forty breakers packed close together, feeding a house that has been rewired twice, where several circuits run in the same bundle for most of their length. In that situation a tool that reports simply found or not found will report found on several adjacent breakers, and you are no further forward. The Ideal 61-534 gives a numeric signal strength instead, which changes the problem entirely: rather than looking for a yes, you sweep the panel and look for the highest number. In our crowded panel test that produced correct identification where simpler tools gave ambiguous results, because the signal is always strongest at the actual breaker even when neighbours also register. The digital sensitivity stepping is precise and repeatable, so you can reduce sensitivity in defined increments rather than nudging a dial and hoping. Performance held up on sub panels and long runs where cheaper tools faded. The costs are money, bulk and a small learning curve. It is priced for the trade, the receiver is larger than the compact consumer tools which makes it fiddlier in a tight panel, and reading a number requires a moment of thought where a beep does not. For anyone regularly working on difficult panels, it is the right instrument.
Pros
- Digital sensitivity control that steps precisely rather than sweeping a dial
- Excellent discrimination between adjacent breakers in tightly packed panels
- Strong performance on sub panels and long circuit runs
- Rugged construction intended for daily trade use
- Clear numeric signal strength display rather than just lights
Cons
- Professional pricing
- Numeric display takes some interpretation compared with a simple beep
- Larger receiver is less convenient in tight panel spaces
The Bottom Line
The best discrimination we measured on a crowded panel. The numeric readout is why.

Best BudgetSperry Instruments CS61200 Breaker Finder
Transmitter and Receiver, Manual Sensitivity, Budget
For a homeowner, a breaker finder is a tool used perhaps twice a year: once when adding an outlet and once when labelling a panel that has never been labelled. Buying a professional instrument for that frequency is difficult to justify, and the relevant question becomes whether the cheapest option works well enough to save the afternoon. The Sperry CS61200 does, with caveats. On our tidy modern panel it correctly identified every circuit, though it typically took three or four passes with the sensitivity dialled progressively down. That is slower than the premium tools but still faster than switching breakers off one at a time and walking back to check. On the crowded old panel it struggled, frequently indicating on two or three adjacent breakers and requiring confirmation by actually switching one off. On the sub panel behind a boiler it was unreliable enough that we would not trust it without verification. Build quality is basic. The plastic is thin, the dial has a vague action, and the whole thing feels like what it costs. None of that stops it working. For a straightforward residential panel and occasional use it is a sensible purchase, and for anything more difficult it will cost you the time you were trying to save.
Pros
- Very low price, making it an easy addition to a homeowner toolkit
- Adequate accuracy on simple residential panels
- Compact and light with a simple two piece design
- Straightforward operation with nothing to configure
- Widely available at hardware retailers
Cons
- Requires several passes and manual dialling to isolate a breaker
- Noticeably less accurate on crowded panels and sub panels
- Build quality reflects the price
The Bottom Line
Cheap enough to own for the two times a year you need one. Expect to work for the answer.

Best Multi PurposeTriplett Fox and Hound 9610
Tone Generator and Probe, Energised and De-Energised, Multi Use
Tone and probe sets have been standard equipment in telecoms and low voltage work for decades, and the principle is straightforward: a generator injects an audio frequency signal onto a conductor and an inductive probe finds it by listening. Applied to mains circuits it identifies breakers, and applied to anything else it identifies that too. For a house with unlabelled network cabling, mystery speaker wires running under floors, and a doorbell transformer nobody can find, that versatility is worth more than pure breaker finding speed. The ability to work on de-energised conductors is the significant technical advantage over conventional finders, which need a live circuit to power their transmitter. During renovation work, when circuits are dead and cables are disconnected, that is precisely when identification is most needed. Where it loses to a purpose built finder is speed and certainty. Sweeping a panel while listening for a tone getting louder is inherently more interpretive than watching a light come on, it is harder in a noisy environment, and it takes practice to trust. For identifying a breaker quickly, a dedicated finder wins. For a toolkit that has to handle whatever unlabelled wire turns up next, this is the better purchase.
Pros
- Works on energised and de-energised circuits, unlike most breaker finders
- Also traces low voltage wiring, network cable and speaker wire
- Tone and probe design that many trades already understand
- Useful for identifying unlabelled cables in a junction box
- Good value for the range of tasks it covers
Cons
- Slower and less automatic than a purpose built breaker finder
- Requires headphone-style listening for the tone in noisy environments
- Interpreting the tone takes practice
The Bottom Line
The generalist. Not the fastest at breakers, but it also handles every other unlabelled wire in the house.
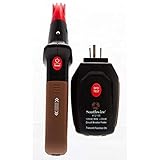
Best Simple OperationSouthwire 40130S Circuit Breaker Finder
Transmitter and Receiver, GFCI Test, Auto Scan
There is a real category of buyer for whom the ideal breaker finder has one control and no instructions, because it will be used rarely and probably by someone who has forgotten how it worked last time. The Southwire 40130S is built for that: plug the transmitter into the outlet, sweep the receiver down the panel, and it indicates the breaker. There is no sensitivity dial to understand and no technique to learn. On standard residential panels the automatic scanning works well, and in our testing it correctly identified circuits on the modern panel with the same reliability as tools costing considerably more. For a homeowner labelling a panel, that is the whole job done without frustration. The GFCI test on the transmitter adds a genuinely useful second function. The limitation is the flip side of the simplicity. When the panel is crowded and the automatic algorithm settles on the wrong sensitivity, there is no way to intervene, and the tool will confidently indicate on more than one breaker with no means of narrowing further. Sub panels showed the same weakness. Priced between the budget tools and the professional ones, it is a good purchase for a normal house and the wrong one for a complicated installation.
Pros
- Automatic scanning that requires no sensitivity adjustment at all
- Very simple to use with essentially no learning curve
- Includes GFCI test function
- Good accuracy on standard residential panels
- Sensibly priced between budget and professional tools
Cons
- Automatic operation removes the manual control useful on difficult panels
- Less capable on sub panels than premium tools
- Indicator is less informative than a numeric display
The Bottom Line
The one to hand to someone who has never used a breaker finder. It just works, until the panel gets complicated.
4. Getting a Clean Result
Technique matters as much as the tool, and a few habits turn an ambiguous result into a definite one.
Start at maximum sensitivity, then reduce. The first sweep confirms the signal is reaching the panel at all and shows the general area. Each subsequent sweep at lower sensitivity eliminates the weakly coupled neighbours until one breaker remains.
Sweep at a consistent speed and distance. Holding the receiver at a varying distance from the breakers changes the reading for reasons that have nothing to do with which circuit you are on. Rest it lightly and move steadily.
Sweep the whole panel before deciding. Stopping at the first indication is how people label the wrong breaker. Continue to the end, note every breaker that registers, then reduce sensitivity and repeat.
Watch for shared neutrals on multi-wire circuits. Two circuits sharing a neutral conductor will both carry part of the signal, which produces two genuine indications. In older houses this is common and it is not a tool fault.
Turn off large loads first. A running air conditioner, a heat pump, or a heavily loaded circuit generates magnetic fields that swamp a weak signal. Switching off the biggest loads before starting makes a real difference in a busy panel.
Verify by switching it off. Once you believe you have the right breaker, switch it and check the outlet with a voltage tester. That takes ten seconds and it is the only step that turns a guess into knowledge.
Label the Panel While You Are There
Once you have identified a circuit, write it on the panel directory immediately. Almost nobody does this, which is why the same identification job gets repeated every few years in every house. An afternoon spent mapping and labelling every circuit is the highest value use of a breaker finder you will ever get.
5. When the Finder Struggles
Some installations defeat these tools, and knowing which ones saves a great deal of frustration blaming the equipment.
Sub panels are harder than main panels. The signal travels further and passes through more shared conductors, and by the time it reaches the sub panel the difference between the target breaker and its neighbours is small. Premium tools with fine sensitivity control do far better here.
Metal conduit shields the signal. Circuits run in metal conduit or armoured cable produce a much weaker external magnetic field, which can reduce a strong signal to something barely detectable. Increasing sensitivity helps, at the cost of more false indications.
Very long runs attenuate the signal. A circuit reaching a detached garage or the far corner of a large house delivers less signal to the panel, and cheap finders may not detect it at all.
AFCI and GFCI breakers can interfere. The electronics inside these breakers change how the signal presents, and some finders react unpredictably. This is not a defect so much as an interaction, and it varies by combination of tool and breaker.
Aluminium wiring behaves differently. Older aluminium branch circuits couple differently and sometimes give weaker or less distinct readings. It is worth a slower, more careful sweep rather than assuming the tool has failed.
The old method still works. When a finder gives an ambiguous answer, switching candidate breakers off one at a time and checking the outlet resolves it definitively. Use the finder to reduce forty candidates to three, then confirm the old way.
6. Mapping and Labelling a Whole Panel
The highest value job a breaker finder does is not identifying one circuit in an emergency. It is spending an afternoon mapping every circuit in the house once, so nobody ever has to guess again.
Work outlet by outlet, not breaker by breaker. Starting at the panel and switching breakers off means walking the house repeatedly for each one. Starting at the outlets and using the finder means one trip to the panel per circuit, which is dramatically faster and does not interrupt anything running.
Write on paper first, the directory second. A rough sketch of the house with circuit numbers pencilled onto each room lets you correct mistakes as you go. Transferring a clean version onto the panel directory at the end produces something legible rather than something crossed out.
Include what is on each circuit, not just the room. A label reading kitchen is far less useful than one reading kitchen counter outlets, north wall. The person reading it in five years will be trying to isolate one specific thing, and room names rarely narrow it down.
Do not forget the hardwired loads. Lights, the furnace, the dishwasher, the disposal, the garage door opener and the bathroom fan all have breakers and none of them has an outlet to plug a transmitter into. Identify these by switching breakers and observing, and note them.
Photograph the finished directory. A picture on a phone means the information survives a directory card going missing, a panel being replaced, or the label fading. It also means you can check from anywhere in the house rather than walking back.
Note anything that surprises you. A bathroom outlet on the same breaker as a bedroom, or a garage circuit reaching into the kitchen, is worth recording and possibly worth mentioning to an electrician. Odd groupings often indicate work done at different times without a plan.
7. Safety Around a Live Panel
Using a breaker finder means opening an electrical panel, which deserves more caution than the simplicity of the tool suggests.
Removing the dead front exposes live parts. Behind the cover, the main lugs and busbars are energised and remain so with every breaker switched off. Those are the parts that cause serious injuries, and they are close to where you will be sweeping a receiver.
Work with one hand where you can. Keeping the other hand out of contact with anything grounded reduces the chance of current crossing your chest if something goes wrong. It is a habit worth having before you need it.
Use insulated tools and dry conditions. Standing on a damp basement floor while reaching into a panel is a bad combination. Dry footwear, a dry surface, and adequate light are minimal precautions.
Never work in a wet or corroded panel. Rust streaks, water staining, or a burning smell mean the panel needs an electrician rather than a breaker finder. These are signs of a problem that identification will not solve.
Older panels of certain brands deserve extra caution. Some panel types from decades past have known safety issues and should be evaluated by an electrician rather than worked on casually. If yours is one of them, that assessment is overdue anyway.
Know your limits. Identifying a breaker is a reasonable homeowner task. Anything requiring conductors to be moved, terminals to be loosened, or a panel to be modified is electrician work, and the cost of getting it wrong is not proportional to the money saved.
Before You Buy
Questions to Settle First
Also Needed for This Job
8. Frequently Asked Questions
What is the best circuit breaker finder?
Klein Tools ET450 for most people, because its automatic sensitivity adjustment narrows down to a single breaker more reliably than manual tools. For crowded panels the Ideal 61-534 gives a numeric signal strength that resolves ambiguity, and Sperry CS61200 is the sensible budget choice.
How accurate are circuit breaker finders?
On a tidy modern panel, a good finder identifies the correct breaker first time. On a crowded old panel or a sub panel, expect several breakers to register and to need two or three passes at reducing sensitivity. Always confirm by switching the breaker and testing the outlet.
Do circuit breaker finders work on dead circuits?
Most do not. The transmitter draws power from the circuit it is plugged into, so a de-energised circuit produces no signal. Tone generators like the Triplett Fox and Hound, and professional locators like the Fluke 2042, inject their own signal and work on dead conductors.
Why does my breaker finder indicate on several breakers?
Conductors running together in a panel couple magnetically, so the signal appears weakly on neighbouring circuits. Reducing sensitivity progressively eliminates the weak indications and leaves the strong one. Shared neutrals on multi-wire circuits also produce two genuinely correct indications.
Can I use a breaker finder on a sub panel?
Yes, but less reliably. The signal has travelled further and through more shared conductors, so the difference between the target breaker and its neighbours is smaller. Tools with fine sensitivity control or a numeric readout handle this much better than simple budget finders.
Is it safe to use a circuit breaker finder myself?
Using the transmitter at an outlet is straightforward. Sweeping the receiver requires opening the panel, and behind the dead front the main lugs and busbars stay energised even with every breaker off. Work in dry conditions with good light, keep one hand clear, and stop if the panel shows rust, water staining or burning smells.
9. Common Breaker Finding Mistakes
Most breaker finder frustration comes down to technique rather than the tool, and a few corrections fix nearly all of it.
Stopping at the First Indication
Sweeping down the panel and labelling the first breaker that lights up is how the wrong circuit gets marked. Several breakers commonly register on the first pass because adjacent conductors couple magnetically. Sweep the entire panel, note everything that registers, then reduce sensitivity and repeat until one remains.
Never Reducing Sensitivity
Maximum sensitivity finds the signal and also finds every neighbour that has picked it up. The whole technique is progressive reduction, and a tool used at one setting throughout will always give an ambiguous answer. Automatic tools do this for you; manual tools require you to do it deliberately.
Trusting the Tool Instead of a Voltage Tester
A breaker finder tells you which breaker to switch off. It does not tell you the circuit is dead, and treating it as though it does is how people work on live conductors. Switch the breaker, then verify at the outlet with a voltage tester before touching anything.
Not Labelling the Panel Afterwards
Having done the work of identifying a circuit, almost nobody writes it down, which is why the same job gets repeated every few years. Mapping and labelling every circuit in an afternoon is by far the most valuable thing a breaker finder ever does for a household.
Everything Else About Breaker Finders
Guide
How to Use a Circuit Breaker Finder
Plug in, calibrate on the panel, sweep and confirm: the method that avoids false hits.
Troubleshooting
Breaker Finder Not Working?
False readings, AFCI and GFCI breakers, dimmers and sensitivity, checked in order.
Guide
How to Label a Breaker Panel
Map every circuit once and write a panel directory that is still right in ten years.
Guide
Which Breaker Controls an Outlet?
With a finder, a lamp and a helper, or a tester, and when to call an electrician.
Comparison
Breaker Finder vs Voltage Tester
One finds the circuit, the other confirms it is dead. Why you want both.
Related Tool Guides
Buyer's Guide
Best Stud Finder
Magnetic versus electronic sensing, and which ones find live wires too.
Buyer's Guide
Best Whole House Surge Protector
Panel-mounted protection compared, and the wiring detail that decides performance.
All Guides
Browse All Best Lists
Every hands-on tested guide we have published, organized by category.
The Bottom Line
The best circuit breaker finder for most people is the Klein Tools ET450, whose automatic sensitivity is the difference between one indication and five. Ideal 61-534 is the answer for crowded panels, and Sperry CS61200 for occasional home use.
Start at high sensitivity and step down, sweep the whole panel before deciding, confirm with a voltage tester, and label the directory while you are standing there.
More in Tools & Equipment
Guides in this category that pair with what you just read.
About the Author
Alex Rivers, Home Improvement Editor
Alex has spent over a decade working on residential and light commercial property maintenance, and now tests every tool, coating and machine that appears in these guides personally.